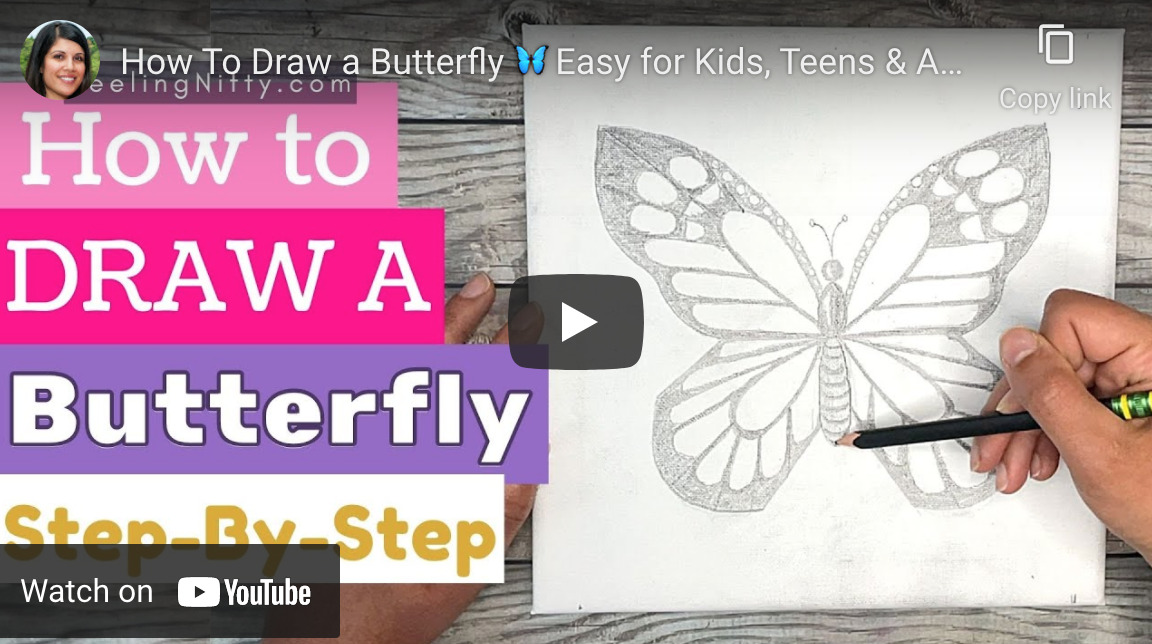
Do you want to learn how to draw a beautiful butterfly? Whether you're a kid, a teen, or an adult, this step-by-step drawing tutorial will help you create a stunning butterfly with ease. Not only that, but you can also use this technique to paint an abstract butterfly or add color with crayons, markers, or watercolors. Let your creativity flourish as you draw and experiment with different colors and patterns!
Drawing the Butterfly Wings Symmetrically
One of the trickiest parts of drawing a butterfly is making sure the wings look symmetrical on both sides. To simplify the process, we'll draw both wings together. This way, you can easily eyeball the symmetry and achieve a balanced result. So let's get started and draw a magnificent butterfly!
YouTube Tutorial for Drawing a Butterfly
If you prefer visual guidance, you can watch the full-length video tutorial on how to paint a butterfly by clicking on the image below or visiting Shill Art – Express Your Creativity:

Step-by-Step Guide
Here's a breakdown of the steps involved in drawing a butterfly:
Step 1: Drawing the Body
Draw the butterfly's head, thorax, and abdomen. This will help center the butterfly on your paper. The body consists of a circular head, an oval-shaped thorax, an oblong oval abdomen, two eyes (semi-circles on either side of the head), and two antennae.
Fun Fact: The shape of a butterfly's antennae can vary from straight to curved, depending on the species.
Step 2: Drawing the Upper Curved Lines
Draw two curved lines from the top part of the body on either side. Try to make these lines equal in length and arch.
Step 3: Drawing the Straight Lines
From the center of the body, draw two straight lines on either side. Ensure that the lines are of equal length.
Step 4: Drawing the Lower Curved Lines
Draw two curved lines from the bottom part of the body on either side. Again, make sure the lines are equal in length and arch.
Step 5: Connecting the Wings
Use a squiggly line to connect the top of each wing to the middle horizontal line. Repeat this step for both sides of the butterfly.
Step 6: Drawing the Diagonal Lines
Draw two diagonal lines from the end of the middle line. Keep them the same length.
Step 7: Completing the Butterfly Shape
Connect the diagonal lines to the bottom arch lines by drawing two semi-circles. This completes the overall shape of your butterfly. Take a step back and ensure both sides look roughly equal. Make any necessary adjustments to achieve symmetry.
Tip: Flip your picture upside down for a fresh perspective. It will help you easily spot any areas that need fixing to ensure your butterfly looks symmetrical.
Step 8: Adding Patterns to the Wings
Draw four tear-drop shapes inside each wing. Remember, the markings and colors on a butterfly's wings vary across species. These patterns serve different purposes like camouflage, protection, and attracting mates. If you need inspiration, you can find pictures of over 50 butterfly species on Shill Art – Express Your Creativity.
Step 9: Drawing the Wing Lines
In each wing quadrant, draw seven straight lines from the tear-drop shape to the outer edge.
Step 10: Creating the Wing Border
Draw a bubble-like border around the outer edge of the wings.
Step 11: Filling in the Wings
Using your pencil, fill in the area between the bubble border and the outer wing.
Step 12: Adding Top Wing Details
Draw semi-circles and “D” shapes for the top three sections of the wings. In the next step, we'll fill in around these shapes.
Step 13: Completing the Wing Patterns
Fill in the areas around the patterns you drew in the previous step using your pencil. Additionally, draw small circles along the top edges of the wings.
Step 14: Enhancing the Wing Lines
Thicken all the lines between the sections on both wings. This will give your butterfly a more defined look.
Step 15: Final Touches
Complete your butterfly by filling in the body. Congratulations, you're done!
Summary of How to Draw a Butterfly
To recap, here's an overview of the step-by-step process for drawing a butterfly:
- Draw the body – head, thorax, abdomen, eyes, and antennae.
- Draw the upper curved lines.
- Draw the straight lines.
- Draw the lower curved lines.
- Connect the wings.
- Draw the diagonal lines.
- Complete the butterfly shape.
- Add tear-drop shapes inside the wings.
- Draw lines within each wing quadrant.
- Create a bubble-like border around the wings.
- Fill in the bordered area with your pencil.
- Add semi-circles and “D” shapes to the top wing sections.
- Fill in around the patterns and add small circles.
- Thicken the lines between the wing sections.
- Fill in the body.
Ideas for Drawing a Butterfly
Here are some fun and easy ideas to make your butterfly even more special:
- Color it in with coloring pencils, crayons, markers, acrylic paint, or watercolors.
- Draw a butterfly on a rock.
- Include it in your art journal.
- Paint it on a mini canvas as a unique gift.
- Use any color you like, such as orange, blue, pink, or purple.
- Draw a butterfly on a flower.
More Drawing Tutorials
If you're eager to practice your drawing skills further, check out these easy step-by-step drawing tutorials:
- Easy-peasy way to draw a monarch butterfly anyone can do.
- Beginner-friendly way to draw a moon.
- Draw an enchanting sea turtle suitable for all ages and skill levels.
Don't forget to pin this tutorial if you find it helpful! Happy drawing!
Follow us on:
- Facebook fanpage:https://www.facebook.com/ShillArt.Official
- Facebook group:https://www.facebook.com/groups/FreeColoringPagesToPrint
- Pinterest:https://www.pinterest.com/ShillArtOfficial
More Coloring Books at here, see now:https://shillart.com/coloring-books
