
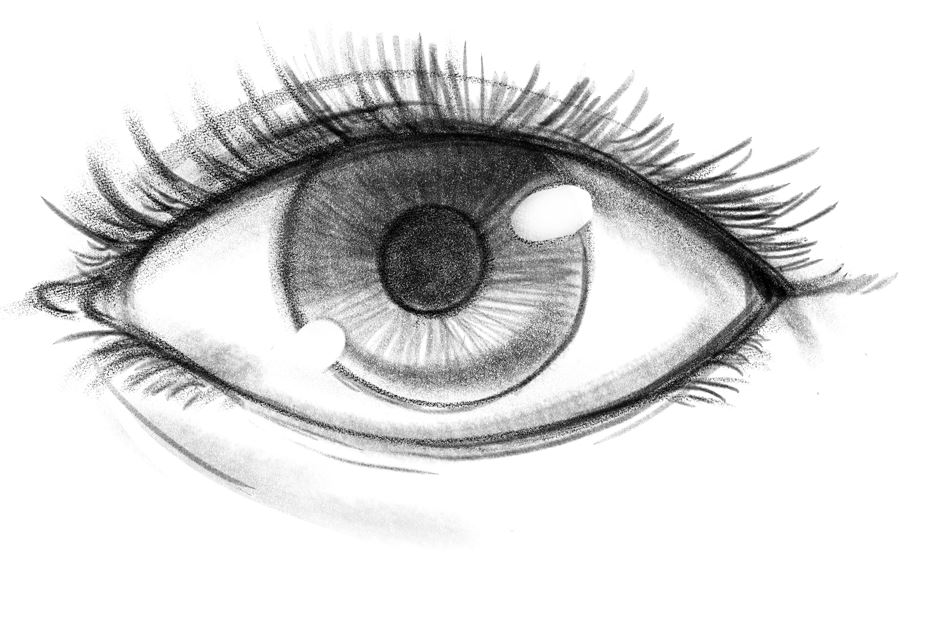
Have you ever struggled to draw eyes? Many artists find it challenging to capture the complexity and emotion of this vital facial feature. But fear not! In this guide, we'll break down the process of drawing eyes into seven simple steps, making it easy for anyone to learn.
Understanding the Basics
Before diving into the details, it's essential to grasp the basic structure of the eye. By starting with simple shapes and gradually progressing, you can establish a solid foundation for your drawing.
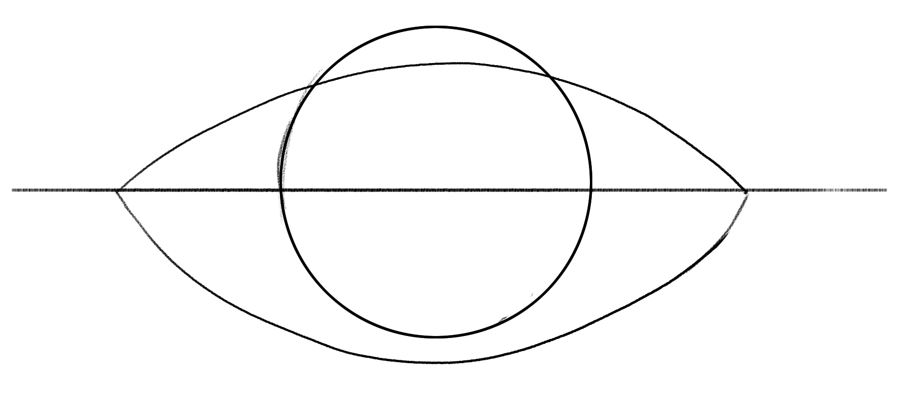
Step #1: Draw The Iris
The iris is the first thing we notice when we look into someone's eyes. To get started, use a pencil to lightly sketch a circle. Don't worry about perfection – this is just an outline. Then, draw a horizontal line through the center of the circle to mark the inner and outer corners of the eye.

Step #2: Sketch The Eyelids
Next, we'll outline the eyelids. Start from the inner corner of the eye and draw a curved line that touches the top of the iris, extending to the outer corner. This forms the upper eyelid. Then, draw another line that touches the bottom of the iris and curves upward to meet the outer corner – this is the lower eyelid. Finally, connect the eye corners with a curved line, ensuring it covers a small portion of the iris.
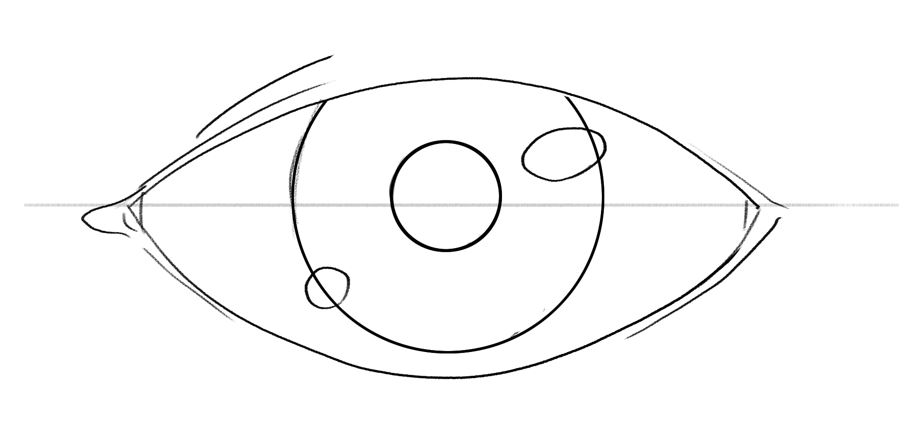
Step #3: Add The Pupil
Now it's time to add the pupil. Remember, the pupil is about two times smaller than the iris and doesn't need to be a perfect circle. After drawing the pupil, go over the eyelids, pupil, and iris with more pressure to make them stand out. Lastly, add the caruncle (the pinkish spot at the inner corner of the eye) and a light reflection if desired.
Adding Depth and Details
To achieve a realistic look, we'll focus on shading and adding finer details to our eye drawing.
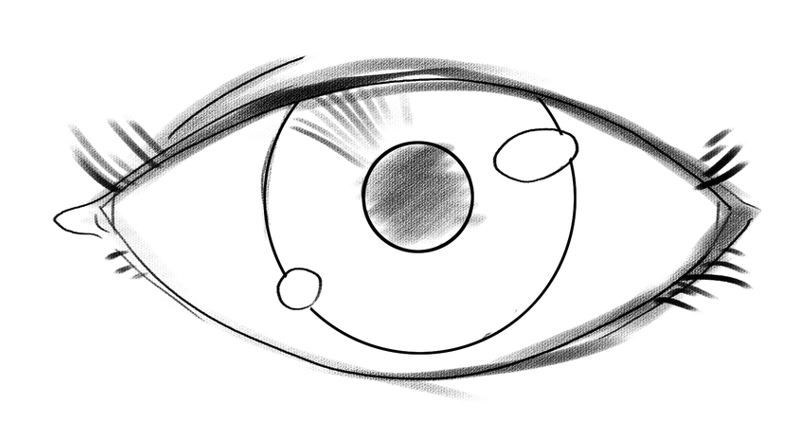
Step #1: Shade The Pupil And Draw The Upper Lash Line
Use a softer pencil to shade the pupil evenly. Darken the eyelids slightly and add the upper lash line below the crease.
Step #2: Shade The Iris
Shade the iris by adding shadows around the highlights, leaving them white. Blend the shades for a smooth transition. To create depth, gently shade the top of the iris and the outer corner.
Finishing Touches
We're almost there! Let's add some final touches to make our eye drawing come to life.
Step #1: Draw The Eyelashes
Using swift, short strokes, draw eyelashes along the upper lash line. They don't need to be uniform in length; slight variations add a natural touch. You can also add some lashes to the corners of the lower lid.
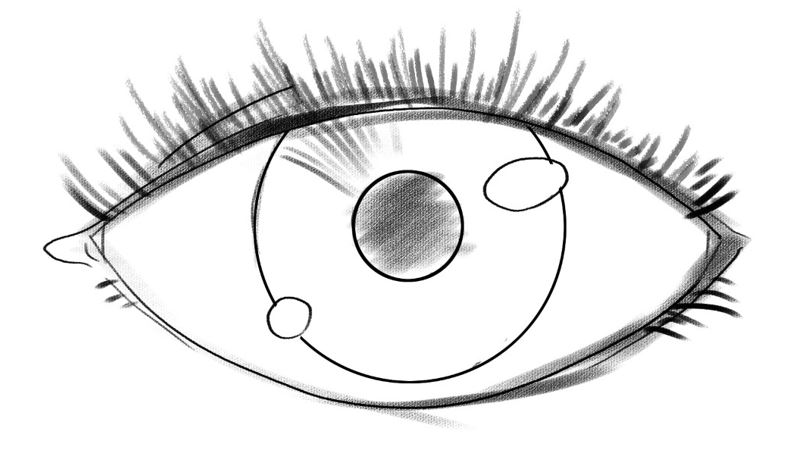
Step #2: Add Depth To Eyes
With a soft pencil, go over the lines once again to enhance them. Pay special attention to the iris, making it darker at the top and edges. Add structure to the iris by drawing lines coming out of the pupil. For a more realistic look, draw a line above the crease and below the lower lid to indicate the eye socket.
Express Your Creativity
Congratulations! You have mastered the art of drawing eyes. Remember, practice makes perfect. Experiment with different techniques and styles to develop your unique artistic voice.
If you're passionate about art and creativity, Shill Art is the perfect platform for you. Join our community at Shill Art – Express Your Creativity and explore our wide range of resources, including free coloring books and exclusive content. Follow us on Facebook and Pinterest for more inspiration.
Now it's your turn to unleash your creativity and bring eyes to life on paper. Don't forget to share your progress in the comments below. Happy drawing!
Follow us on:
- Facebook fanpage:https://www.facebook.com/ShillArt.Official
- Facebook group:https://www.facebook.com/groups/FreeColoringPagesToPrint
- Pinterest:https://www.pinterest.com/ShillArtOfficial
More Coloring Books at here, see now:https://shillart.com/coloring-books