
Frozen, the captivating film by Disney Studios, has quickly become a modern classic, capturing the hearts of audiences everywhere. The character Elsa, with her mesmerizing ice powers, has become a favorite among many. If you admire this icy yet caring character, then this step-by-step guide on how to draw Elsa in just 6 steps is perfect for you!
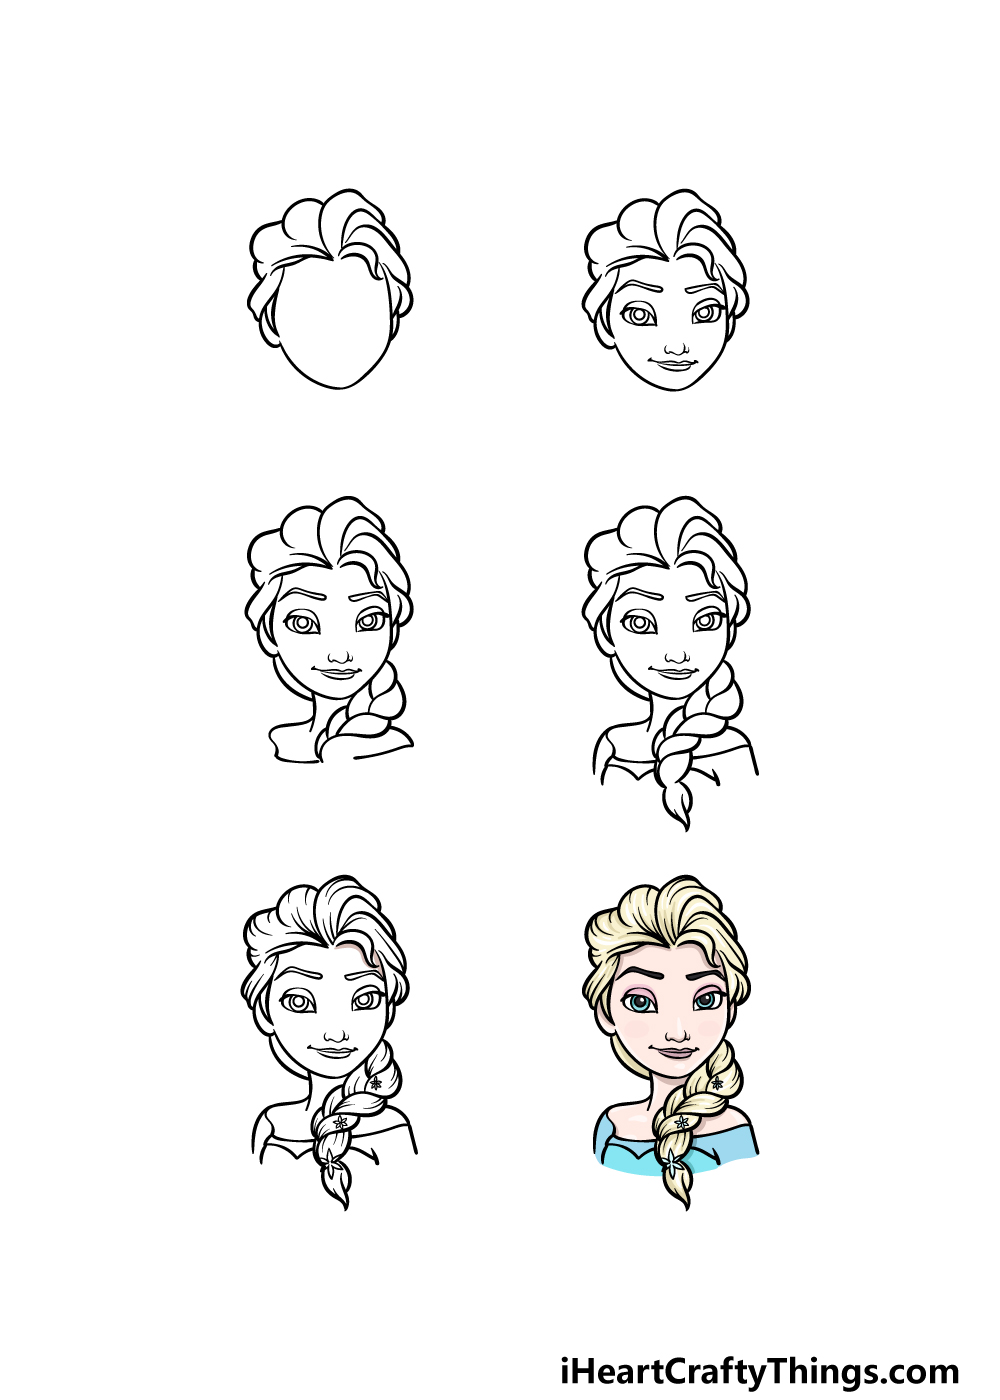
Let's Get Started!
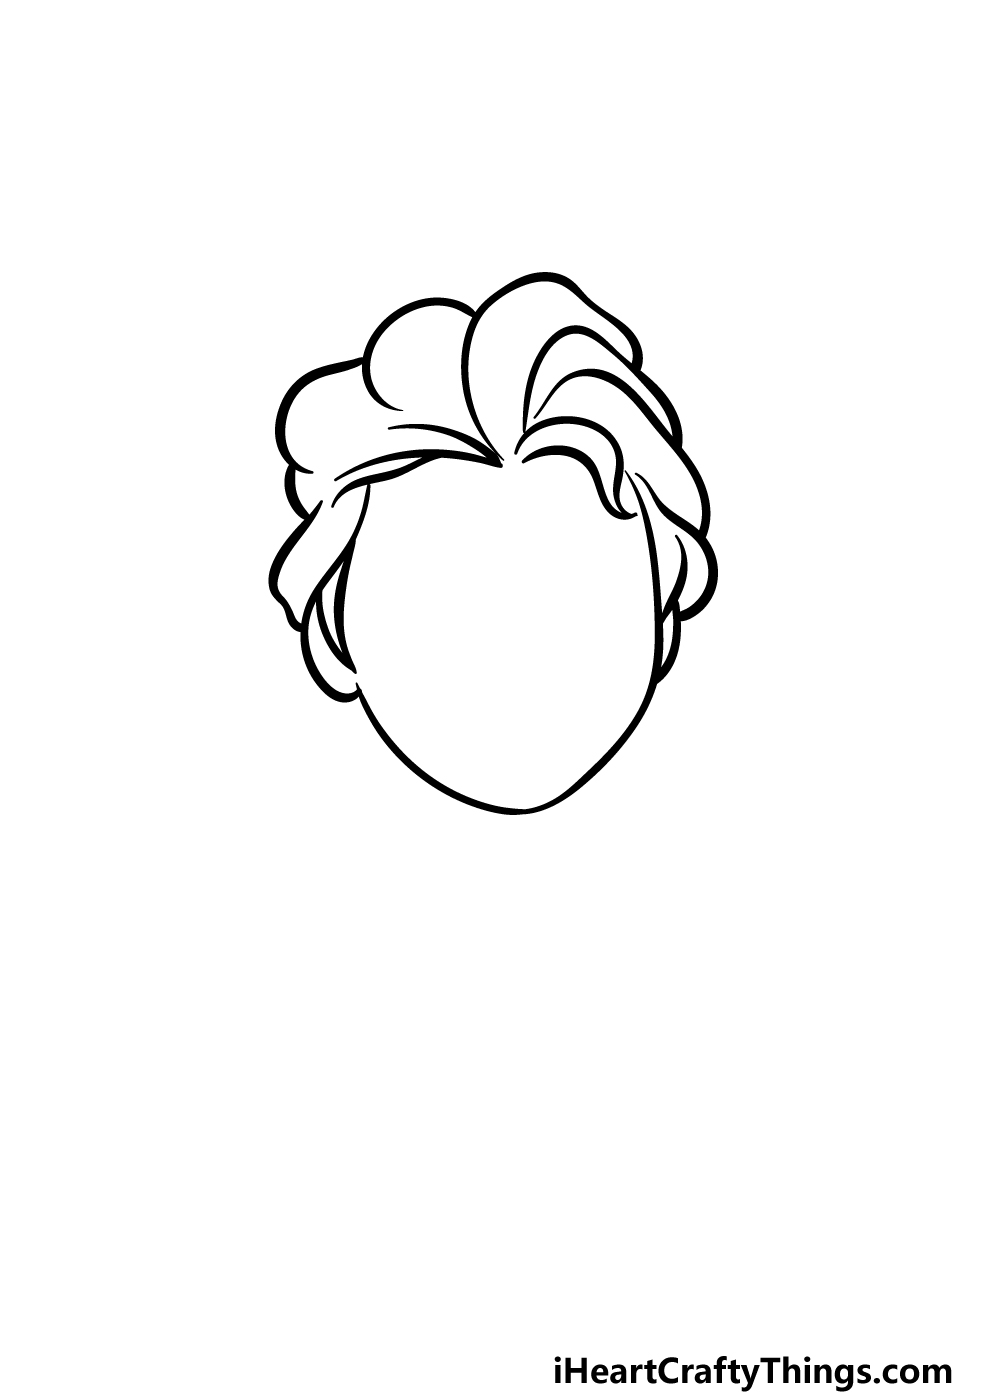
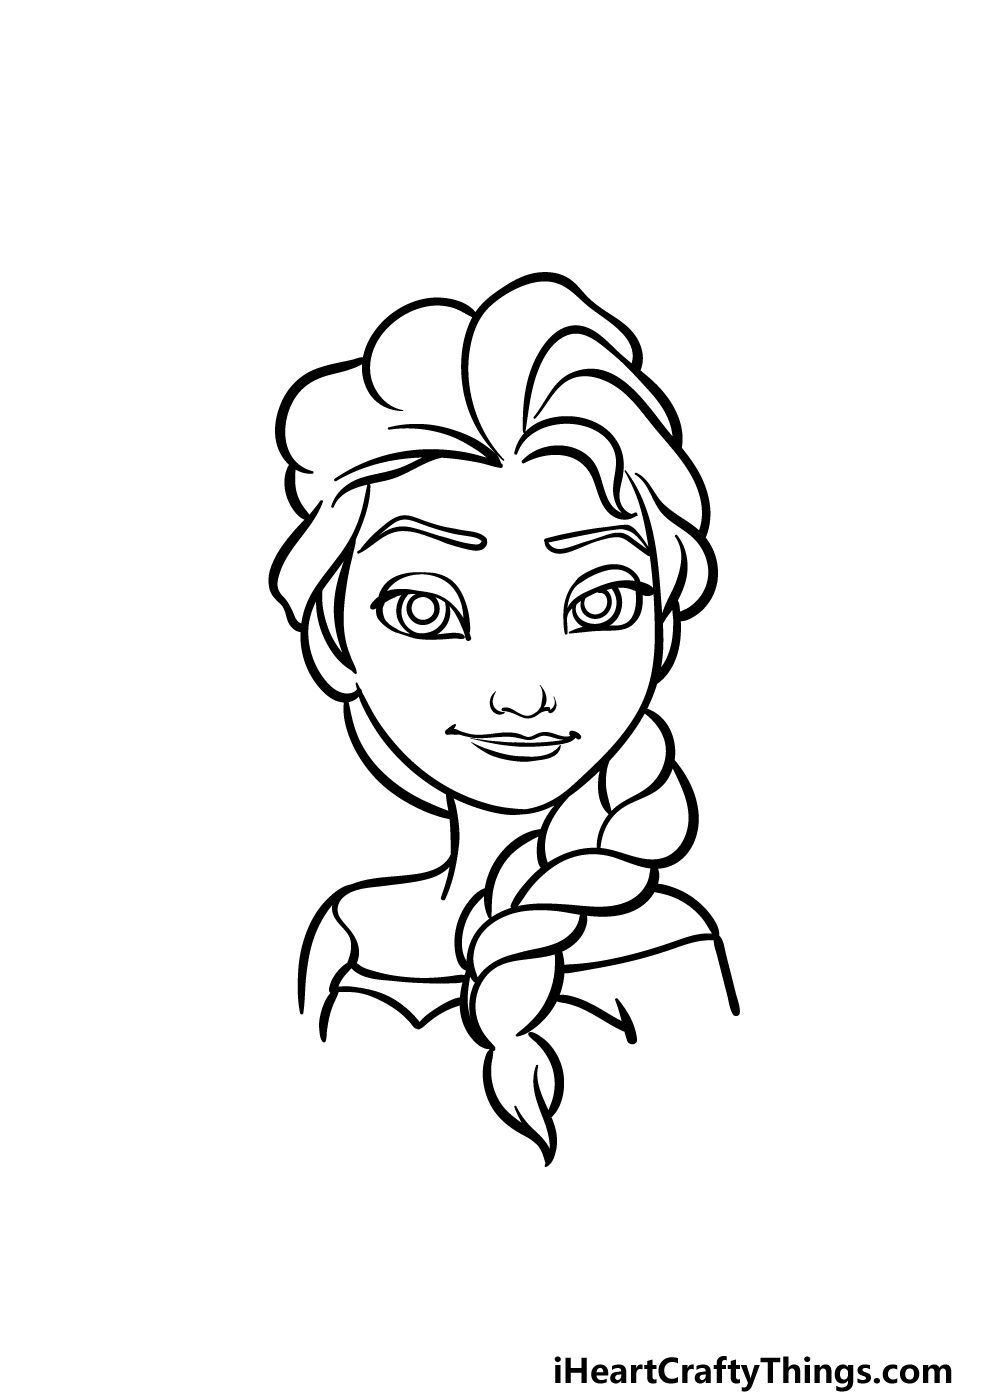
Step 1: Face and Hair Outline
To begin, let's outline Elsa's face and hair. Use smooth, curved lines to create the shape of her face and add her ears with smaller curved lines. Her hair is tied up, and drawing it with connecting curved lines will give it a sectioned appearance. Once you're done, move on to step 2.
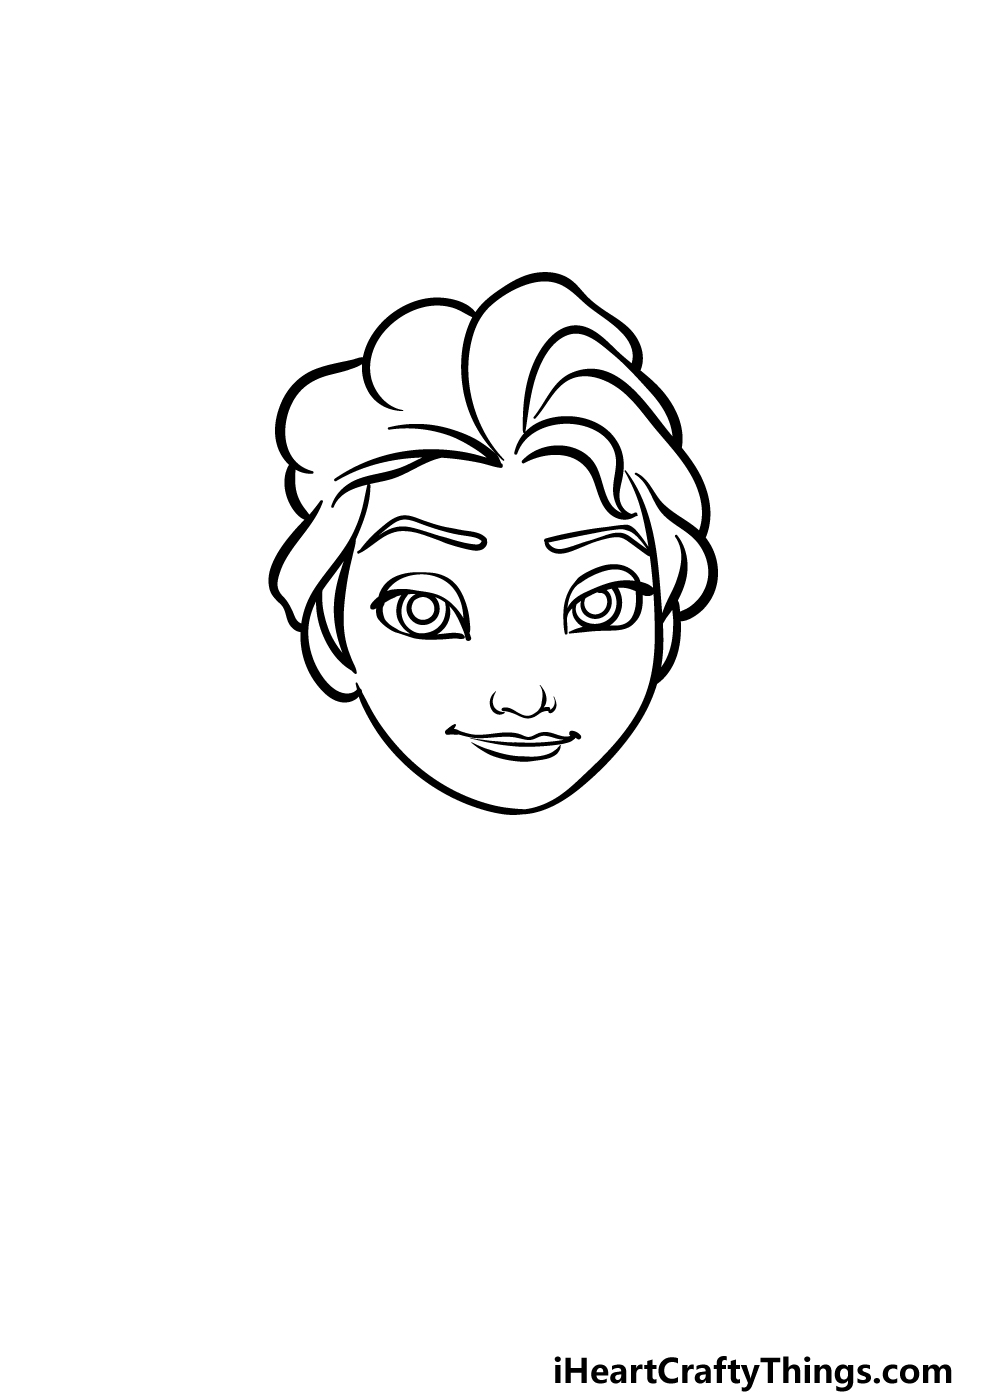
Step 2: Elsa's Facial Expression
In this step, we'll focus on capturing Elsa's serious and sarcastic character through her facial expression. Draw her big, rounded eyes with pointy tips at the ends. Add lines to depict lowered eyelids and draw thin, curved shapes for her eyebrows. Complete her expression with simple lines for the nose and a slightly smiling mouth.
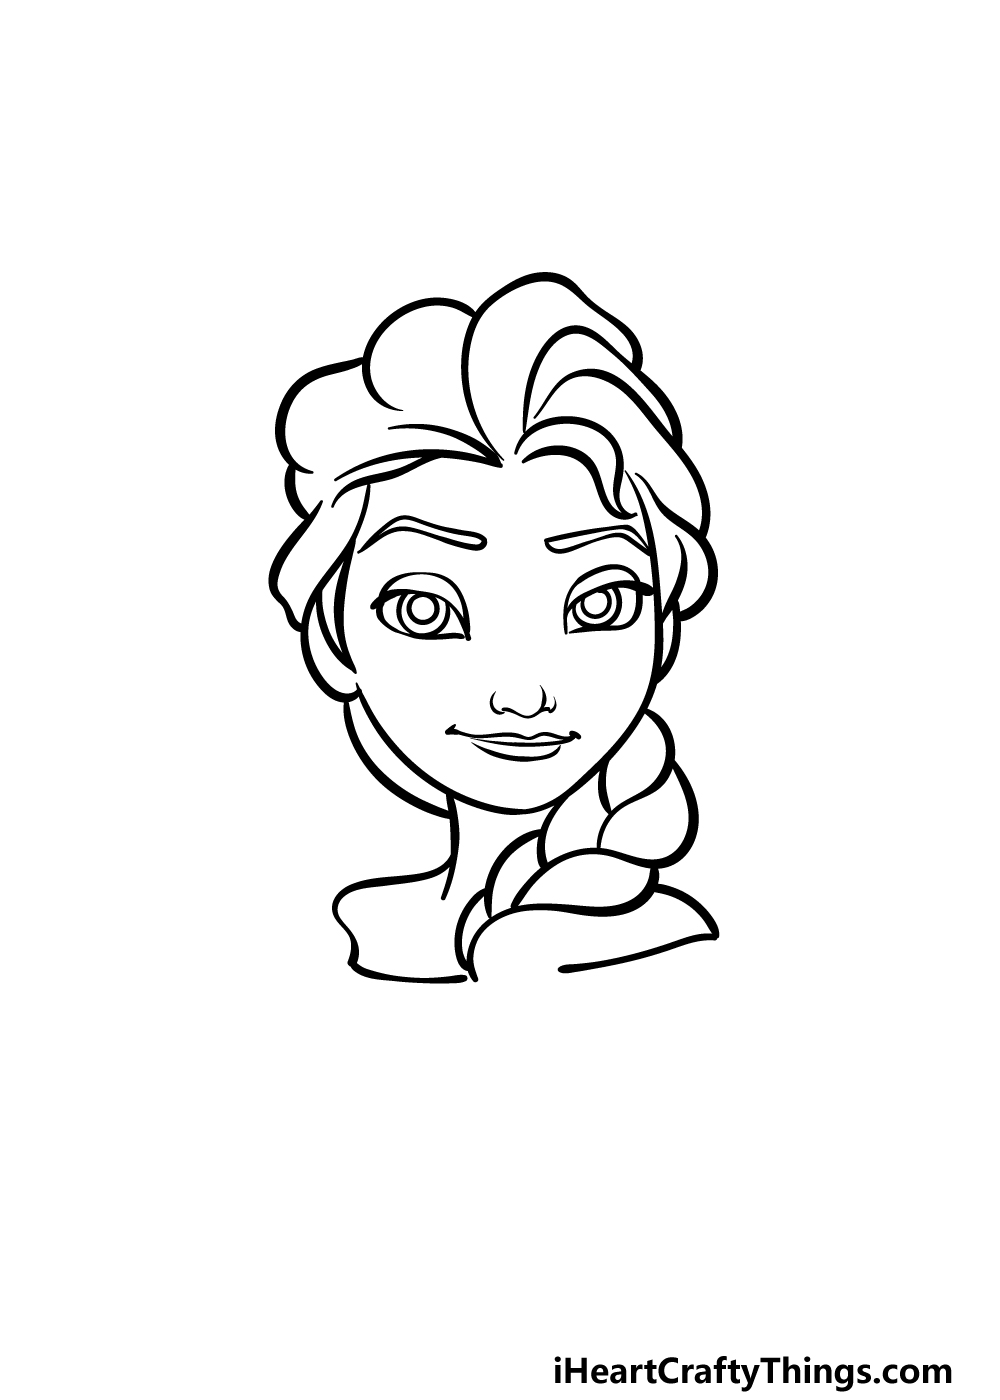
Step 3: Neck and Hair Braid
Now, let's add Elsa's neck and the start of her thick hair braids. Extend curved lines down from the base of her head to form her neck and shoulders. Drawing the hair braid can be a bit challenging, so refer to our reference image for guidance. Use curved lines to create twisty sections of the hair, leaving an empty space at the bottom.
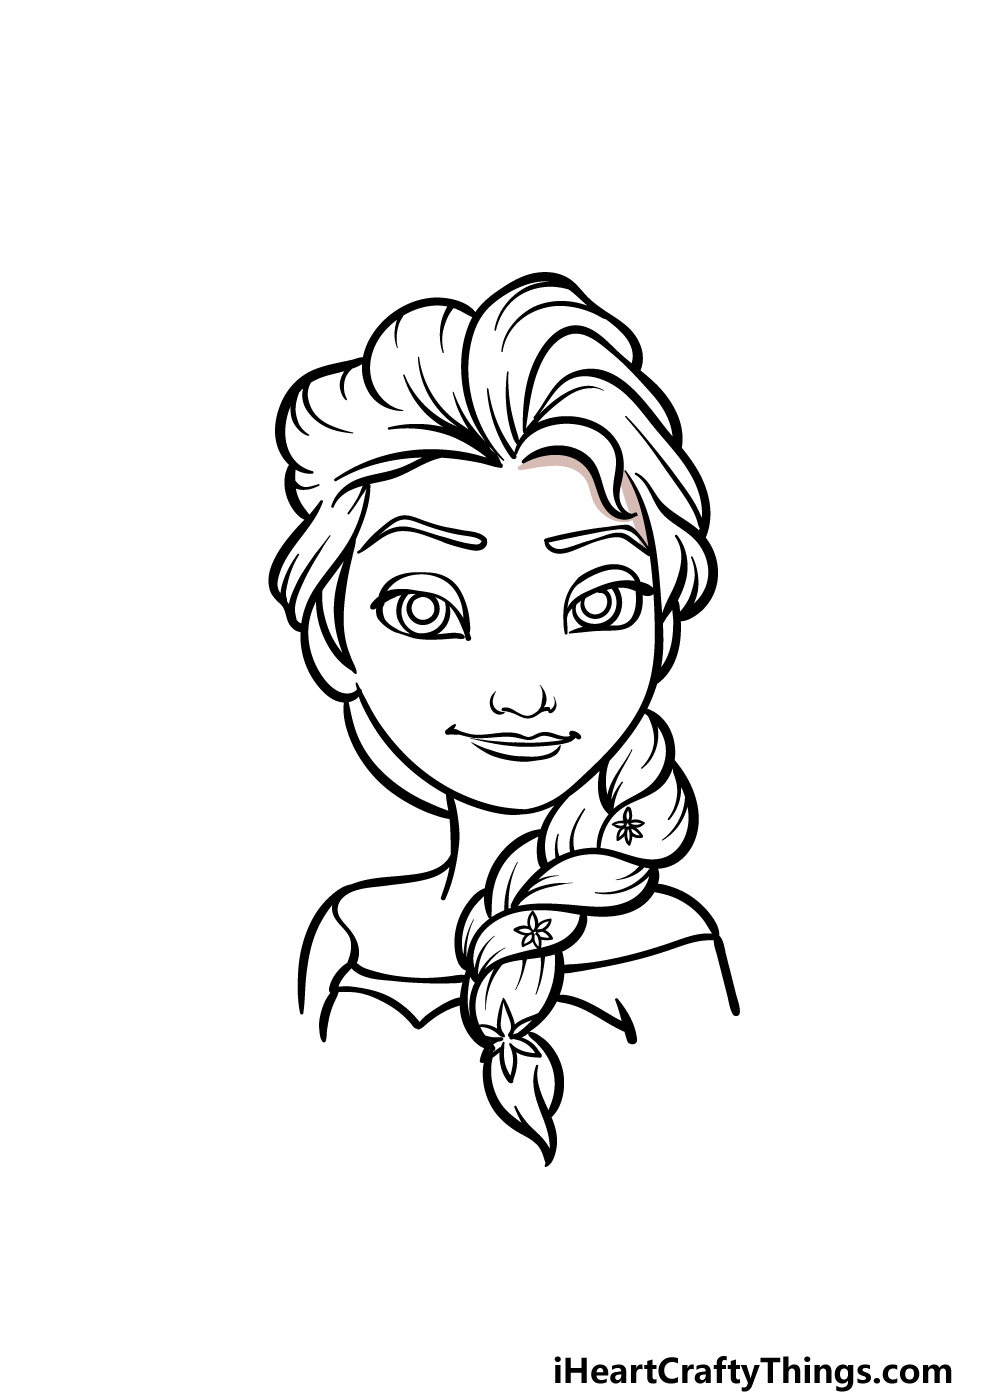
Step 4: Rest of the Braid and Shoulders
Before moving on to the final details, finish off the outline of Elsa. Extend lines from her neck and shoulders to draw the top of her chest and arms. Complete this step by adding the pointy end of her braid hanging down.
Step 5: Final Details
To bring your Elsa drawing to life, add some final small details. Focus mainly on her hair by drawing curving lines to depict individual strands. You can also embellish her hair with small, pretty flowers. Feel free to add more personal touches or ideas to make your drawing unique. You could draw more of her body or create a beautiful background. The choice is yours!
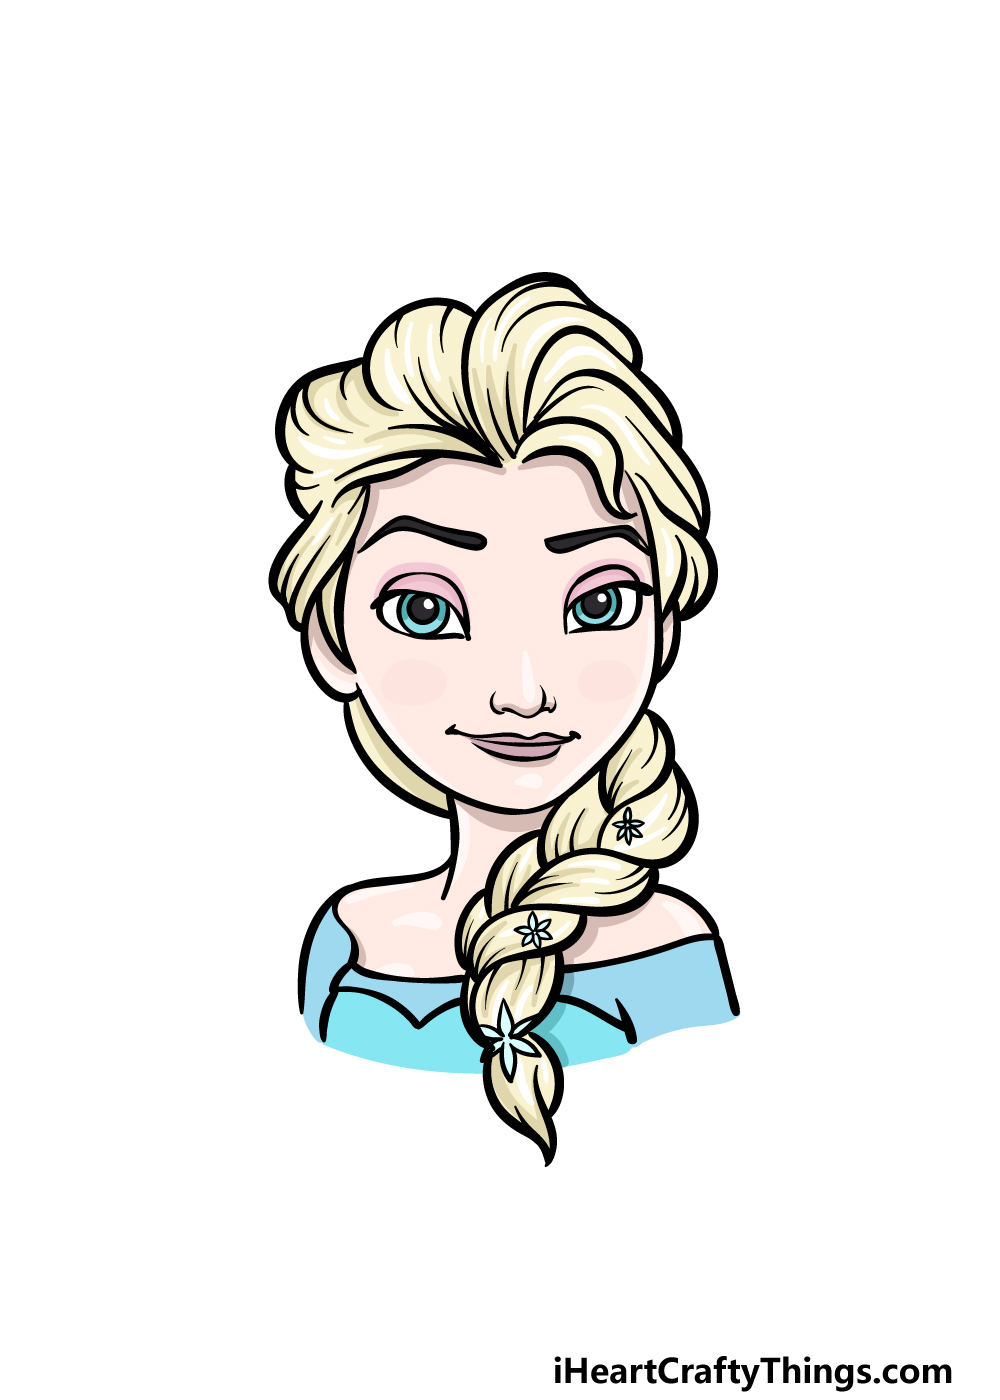
Step 6: Finish with Color
Elsa's color scheme reflects her ice-themed powers. For her hair, use light yellows, and for her dress, opt for mild blues. Watercolor paints can give the colors a cooler look, but you can use any medium you prefer. Let your imagination run wild and decide if you want to stick with the original colors or create a unique look for Elsa!
Express Your Creativity with Elsa
With the completion of your Elsa drawing, the fun has just begun! You can enhance your artwork by adding additional details. Consider expanding on Elsa's design by drawing more of her body or exploring her alternative looks from different movie appearances. You can also depict the bond between Elsa and her sister Anna by adding Anna to your drawing. Show them in a pose that captures the essence of their wonderful relationship.
To further elevate your Elsa masterpiece, unleash your artistic skills to represent her magical ice powers. Experiment with different art tools and mediums to portray the flowing ice powers. Using paints and brushes with longer strokes can create a sense of motion and magic. Don't hesitate to add stickers and glitter for that extra touch of enchantment.
Your Elsa drawing is now complete! We hope that following this guide has been a fun and rewarding experience for you. Remember, the possibilities for creativity are endless. Share your wonderful creation with us on our Facebook and Pinterest pages. Also, be sure to visit our website for more exciting drawing guides.
Express your creativity with Shill Art – Express Your Creativity!
Shill Art – Express Your Creativity
Follow us on:
- Facebook fanpage:https://www.facebook.com/ShillArt.Official
- Facebook group:https://www.facebook.com/groups/FreeColoringPagesToPrint
- Pinterest:https://www.pinterest.com/ShillArtOfficial
More Coloring Books at here, see now:https://shillart.com/coloring-books