
Are you interested in paper crafts? Learning to fold paper leaves is a fundamental skill that you can use to create various artistic projects. Whether you want to make leaf garlands, ornamental decorations, or incorporate them into paper flowers, knowing how to make paper leaves will come in handy. In this article, we will guide you through the process of creating two types of paper leaves. So, let's dive into the tutorial and unleash your creativity!
Before we begin, we'd like to invite you to visit our Youtube channel. There, you'll find a treasure trove of easy craft tutorials that we upload every week. It's a fantastic resource for craft enthusiasts like you. Plus, subscribing to our channel would mean the world to us.
Materials Required:
To make paper leaves, you'll need the following materials:
- Color paper (or any paper you have at hand)
- Scissors
- Glue
- Pencil
Step-by-Step Tutorial to Make Paper Leaves:

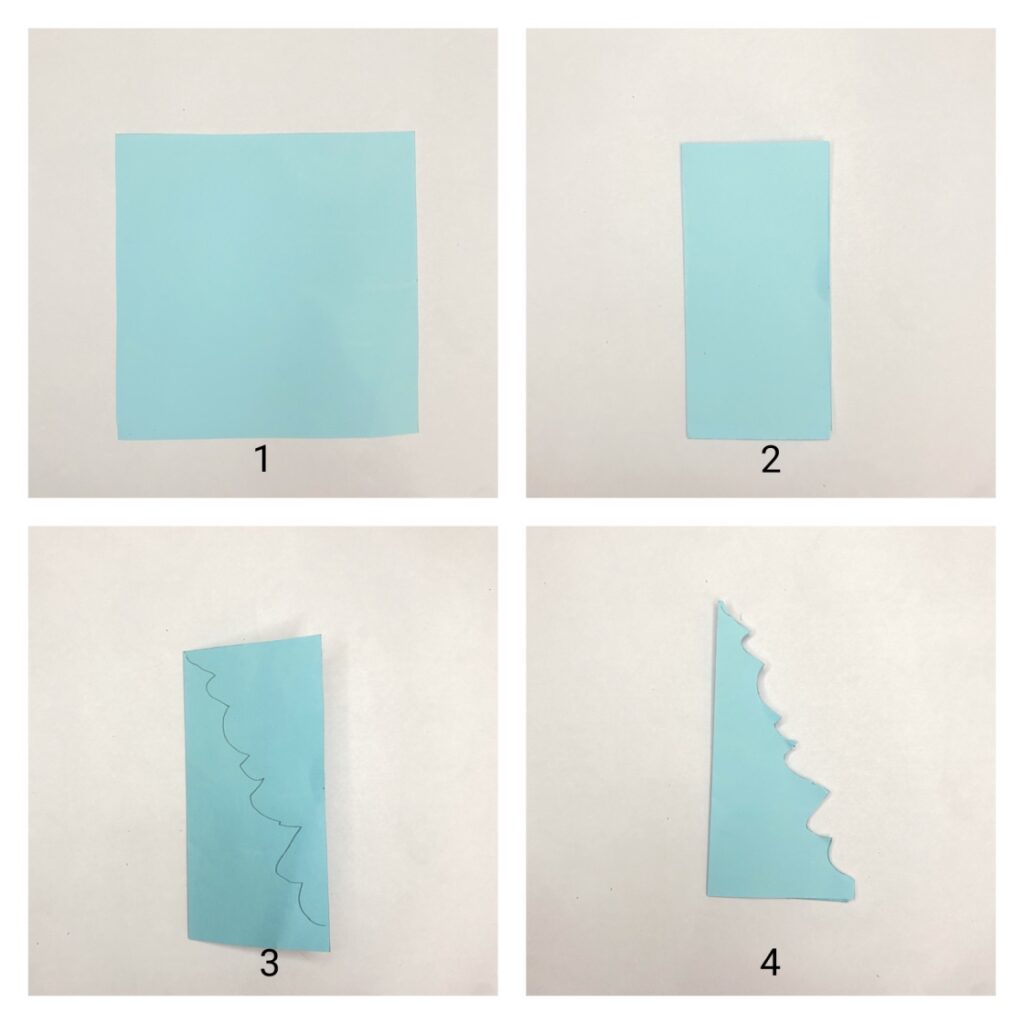
- Start by cutting a square piece of paper measuring 10 cm * 10 cm.
- Fold the paper in half vertically, from left to right.
- Draw a diagonal line from the top left corner to the bottom right corner.
- Cut along the diagonal line.
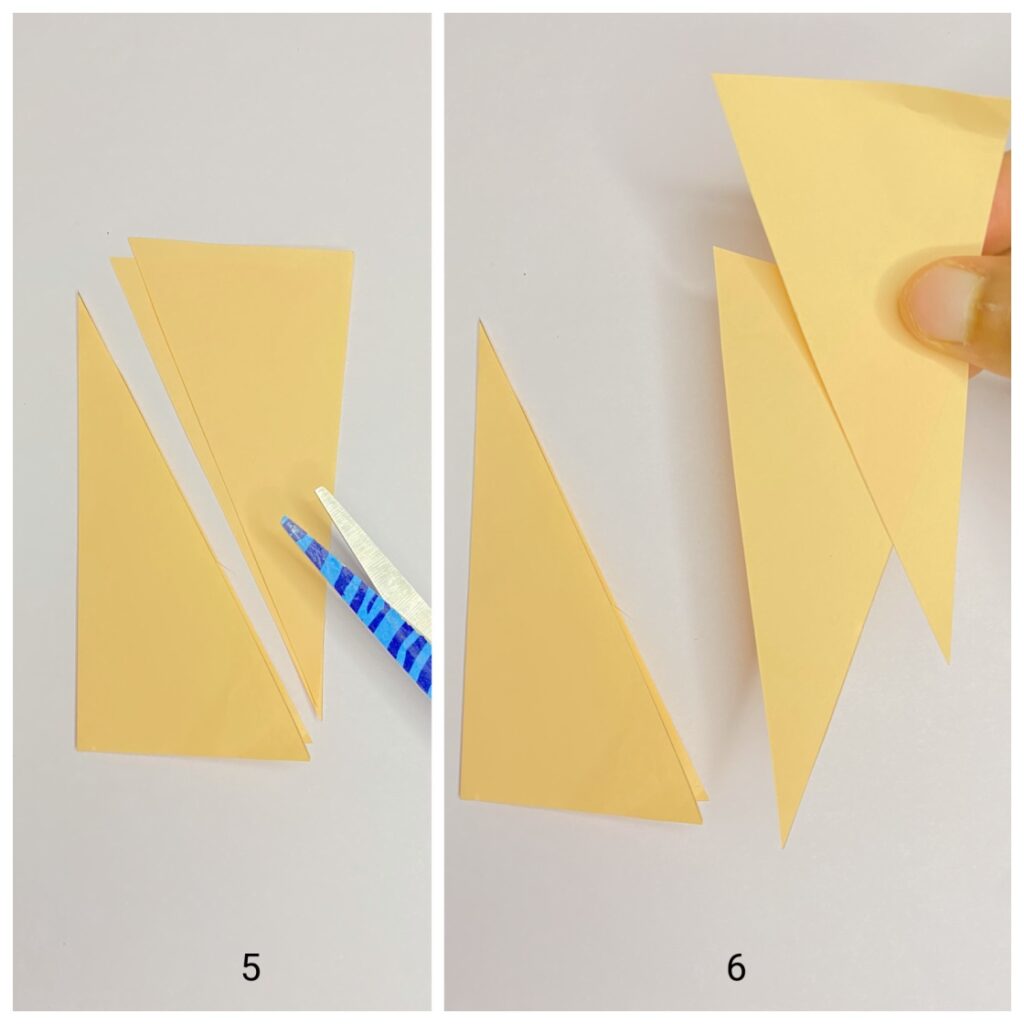
- Now you have three separate pieces of paper.
- Keep only the folded paper (the piece on the left side of the image) and discard the rest.
- Open the folded paper.
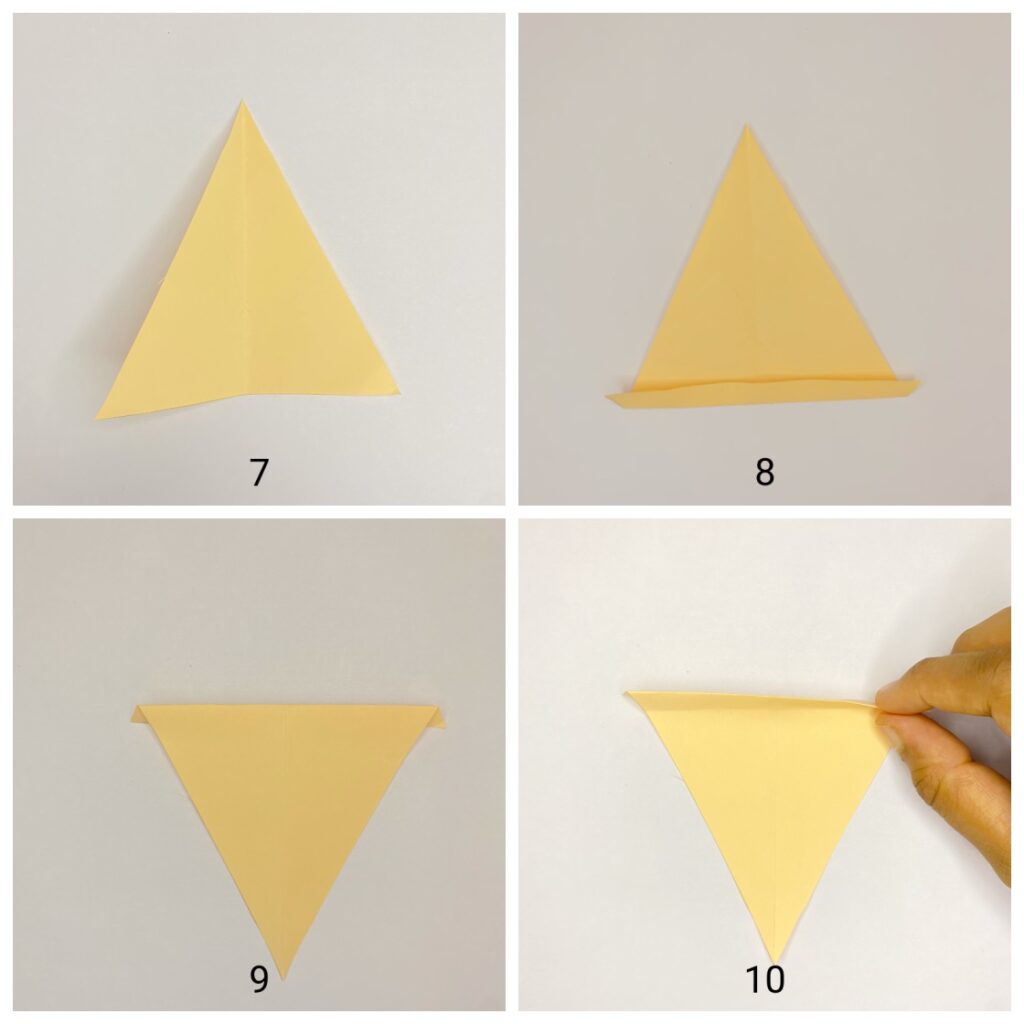
- Starting from the bottom, make zig-zag folds on the paper. These folds are known as concertina folds or zig-zag folds.
- Continue folding in a zig-zag manner until you leave a small triangular space in the top corner, as shown in the image.
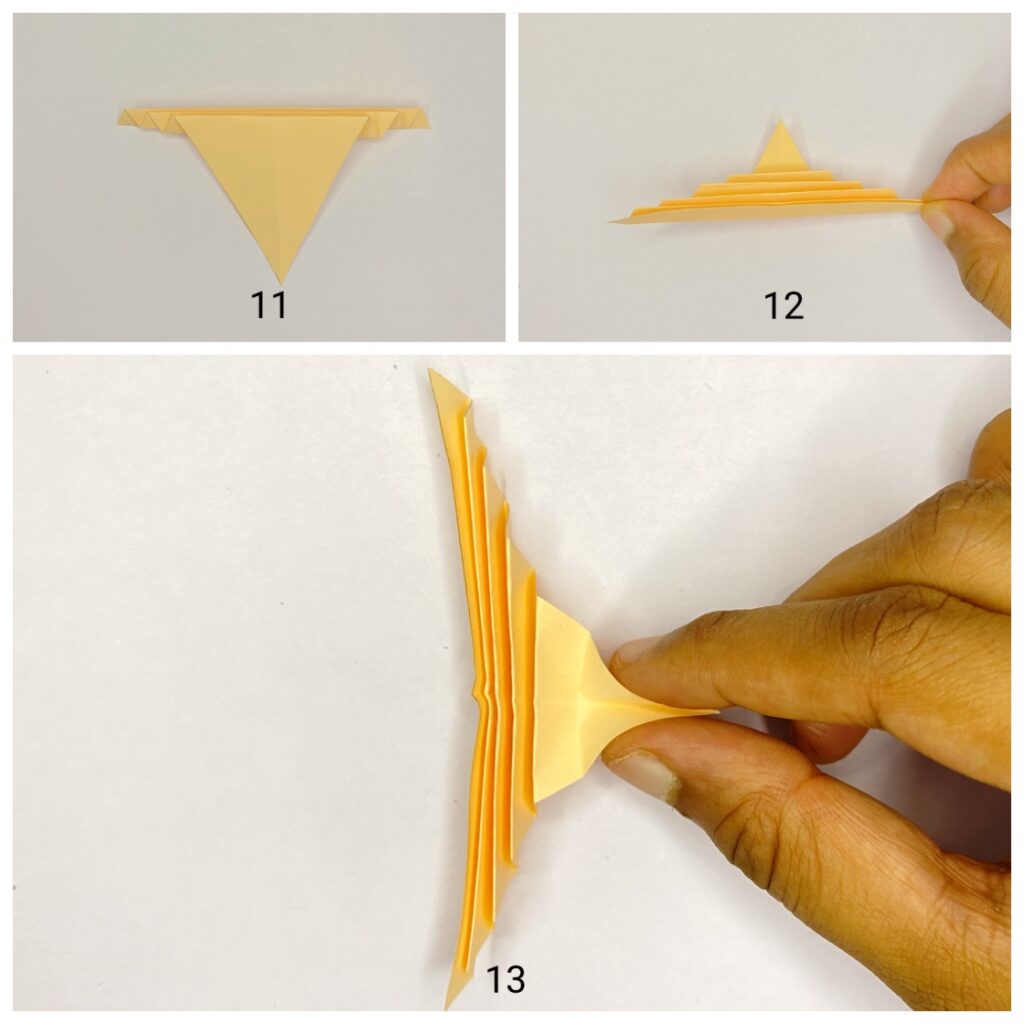
- Make a bend and fold the paper in the middle, just like in the image.
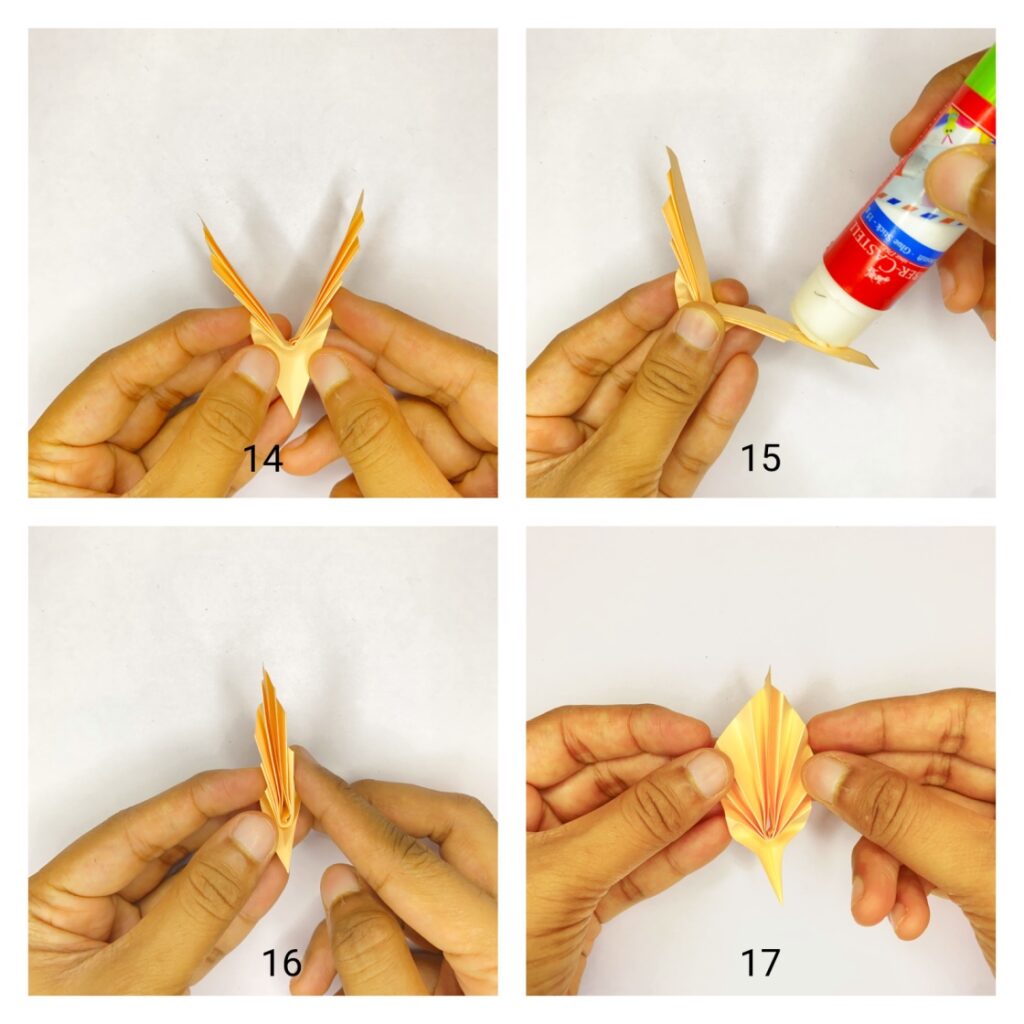
- Apply glue between the folds and stick them together.
- Voila! Your paper leaf is ready.
Now, let's move on to creating the next paper leaf.
Paper Leaf No. 2
- Cut another square piece of paper, this time measuring 10 cm.
- Fold the paper from left to right, creating a crease.
- Draw a leaf outline on the paper, similar to the one shown in the image. Feel free to experiment with different shapes and sizes.
- Cut along the outline.
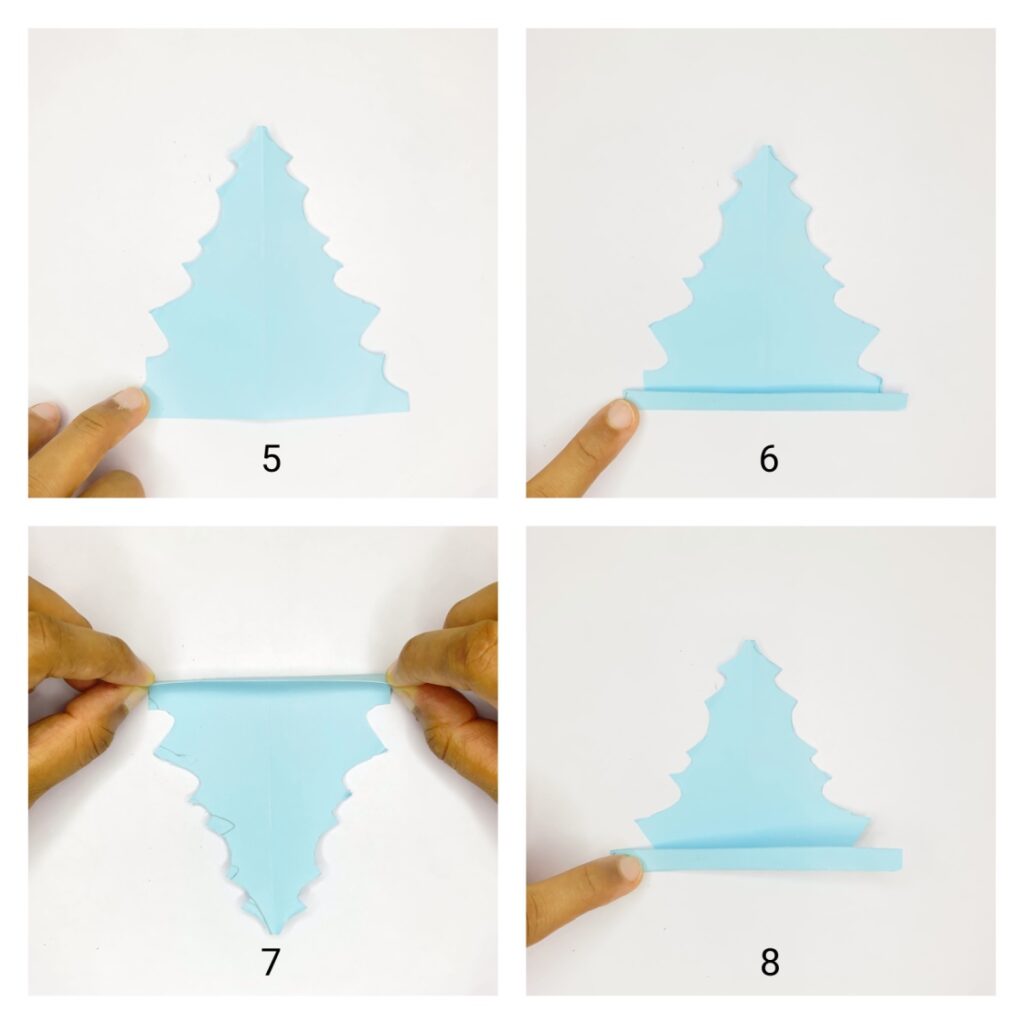
- Open the folded paper.
- Start making zig-zag folds on the paper.

- Continue folding in a zig-zag manner until you leave a small triangular space in the top corner, just like in the previous leaf.
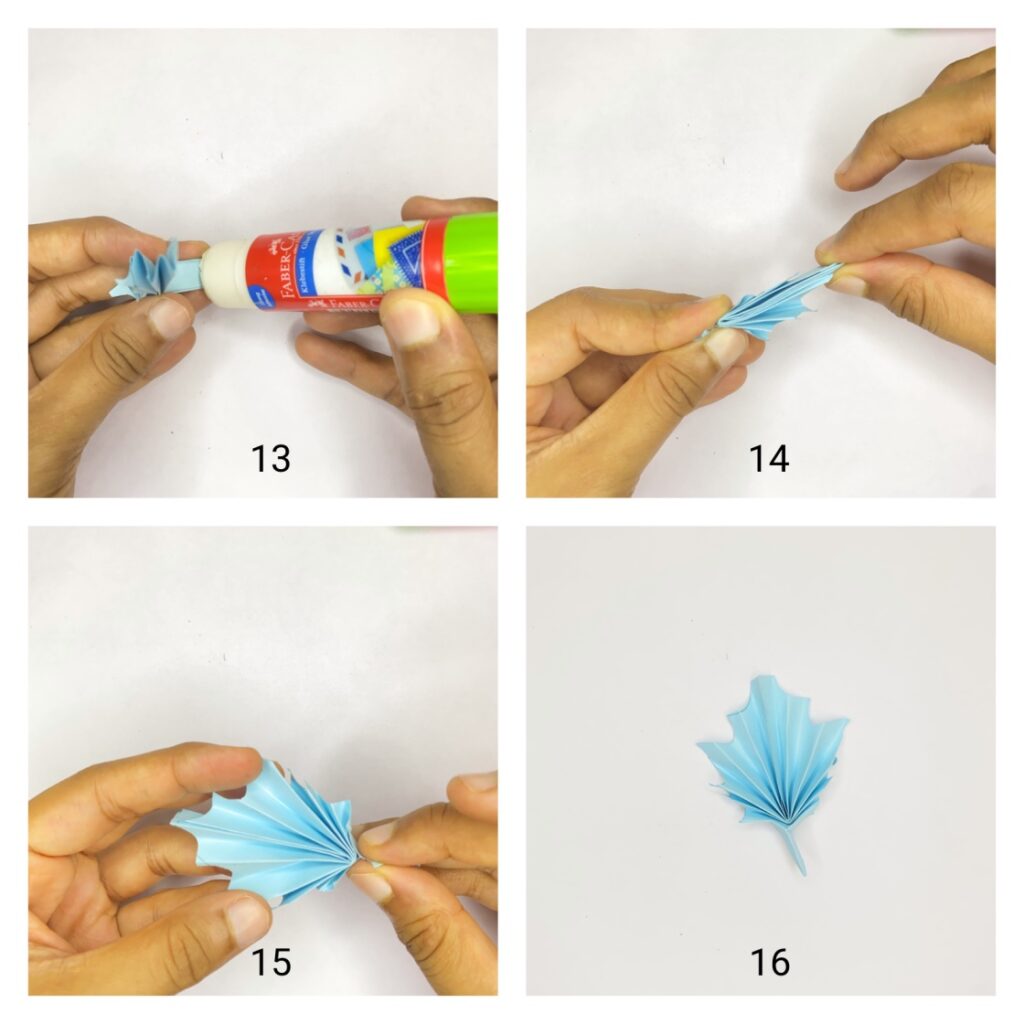
- Make a bend in the middle and fold the paper in half. Apply glue between the folds and shape the base of the leaf.
- Congratulations! You've made another fabulous paper leaf.
Video Tutorial to Make Paper Leaf:
In case you have any doubts about any step, feel free to watch our detailed video tutorial below. We walk you through every step, ensuring you create beautiful paper leaves with ease. Also, don't forget to subscribe to our Youtube channel for more exciting craft ideas every week.
More Craft Tutorials:
- How to make a paper rose step-by-step
- How to make a paper sunflower step-by-step
- Easy summer ice cream popsicle craft (with free template)
- How to make a paper fish step-by-step
- Easy paper plate flower garden wreath (with free template)
Express Your Creativity with Shill Art! Don't forget to visit our website for more inspiration and ideas. Let your artistic side flourish!
Note: The images used in this article are sourced from the original article.
Follow us on:
- Facebook fanpage:https://www.facebook.com/ShillArt.Official
- Facebook group:https://www.facebook.com/groups/FreeColoringPagesToPrint
- Pinterest:https://www.pinterest.com/ShillArtOfficial
More Coloring Books at here, see now:https://shillart.com/coloring-books