
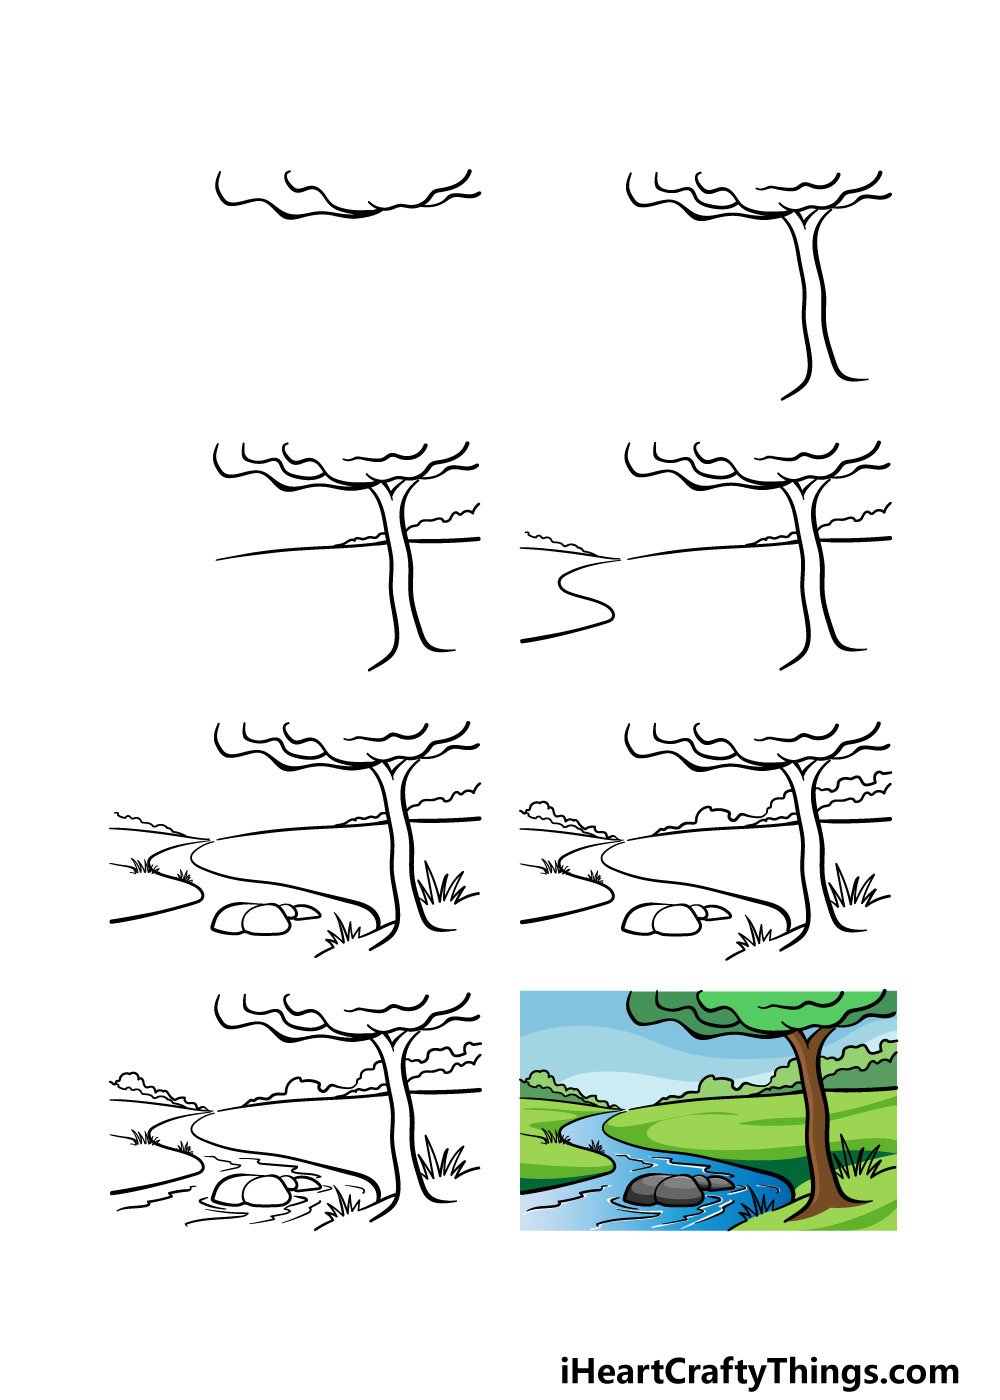
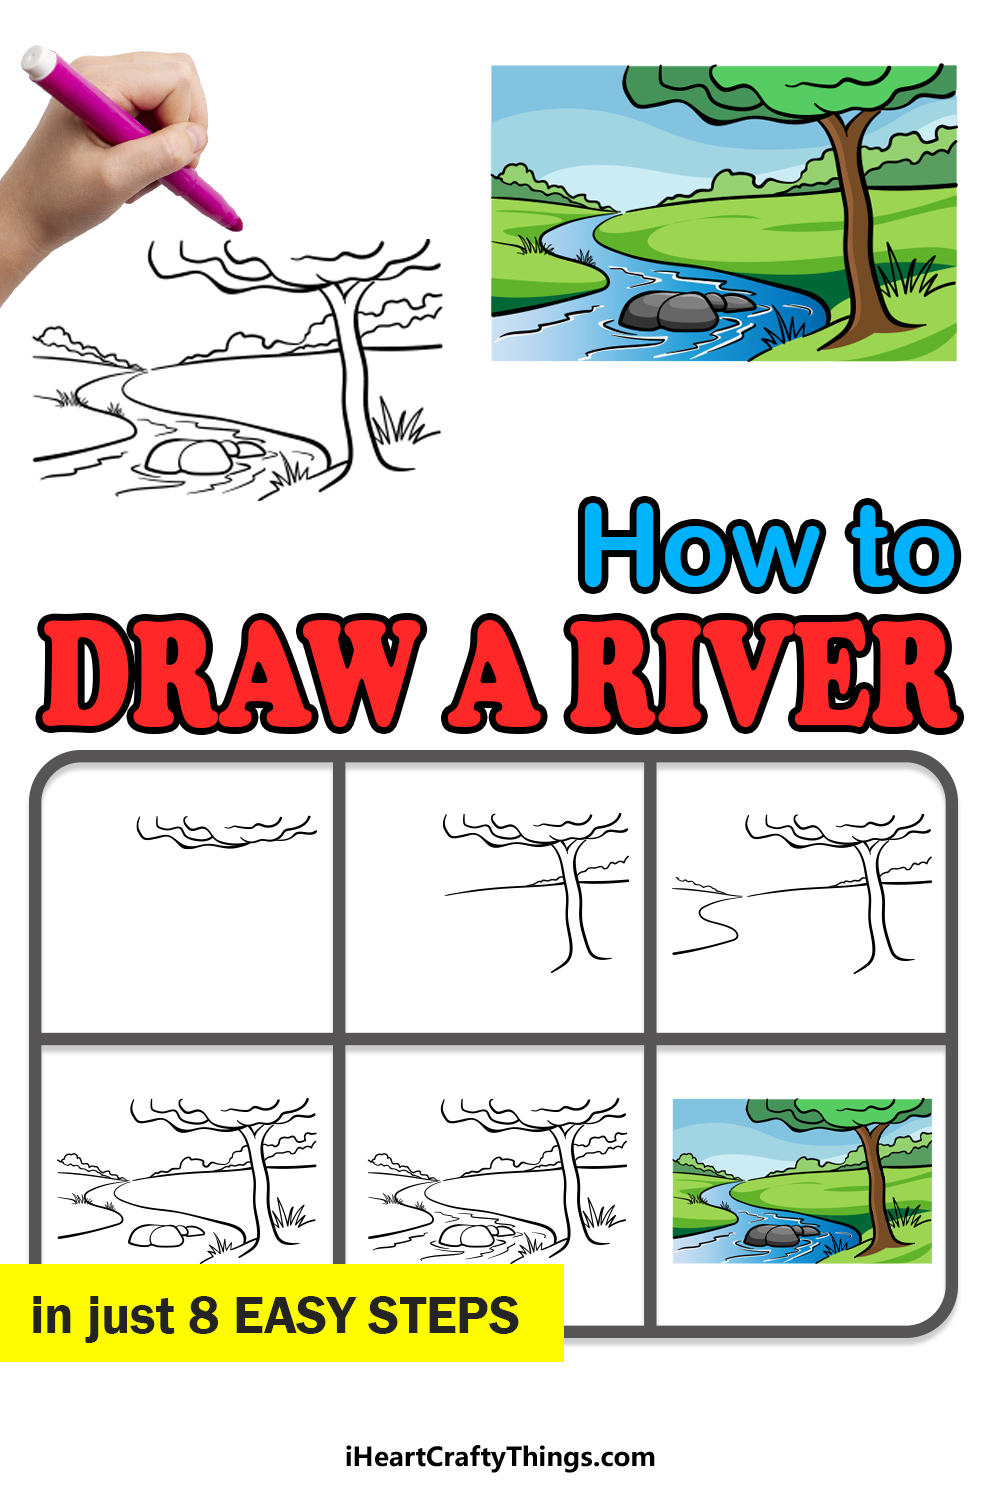
There's something truly mesmerizing about sitting by a tranquil river, letting your senses be captivated by the soothing sights and sounds. Rivers have always been a popular subject in art, showcasing their natural beauty and serenity. If you've ever wondered how to draw a river, then this step-by-step guide is here to help you unleash your creativity and bring this peaceful scene to life!
Let's Get Started!
Step 1 – Begin with the Majestic Tree
To start your river drawing, we'll focus on the tree that gracefully stands over the waters. Take your pencil and carefully sketch the top of the tree, using curved lines to create a leafy canopy. Let the lines connect and form a stylish representation of the tree's foliage.

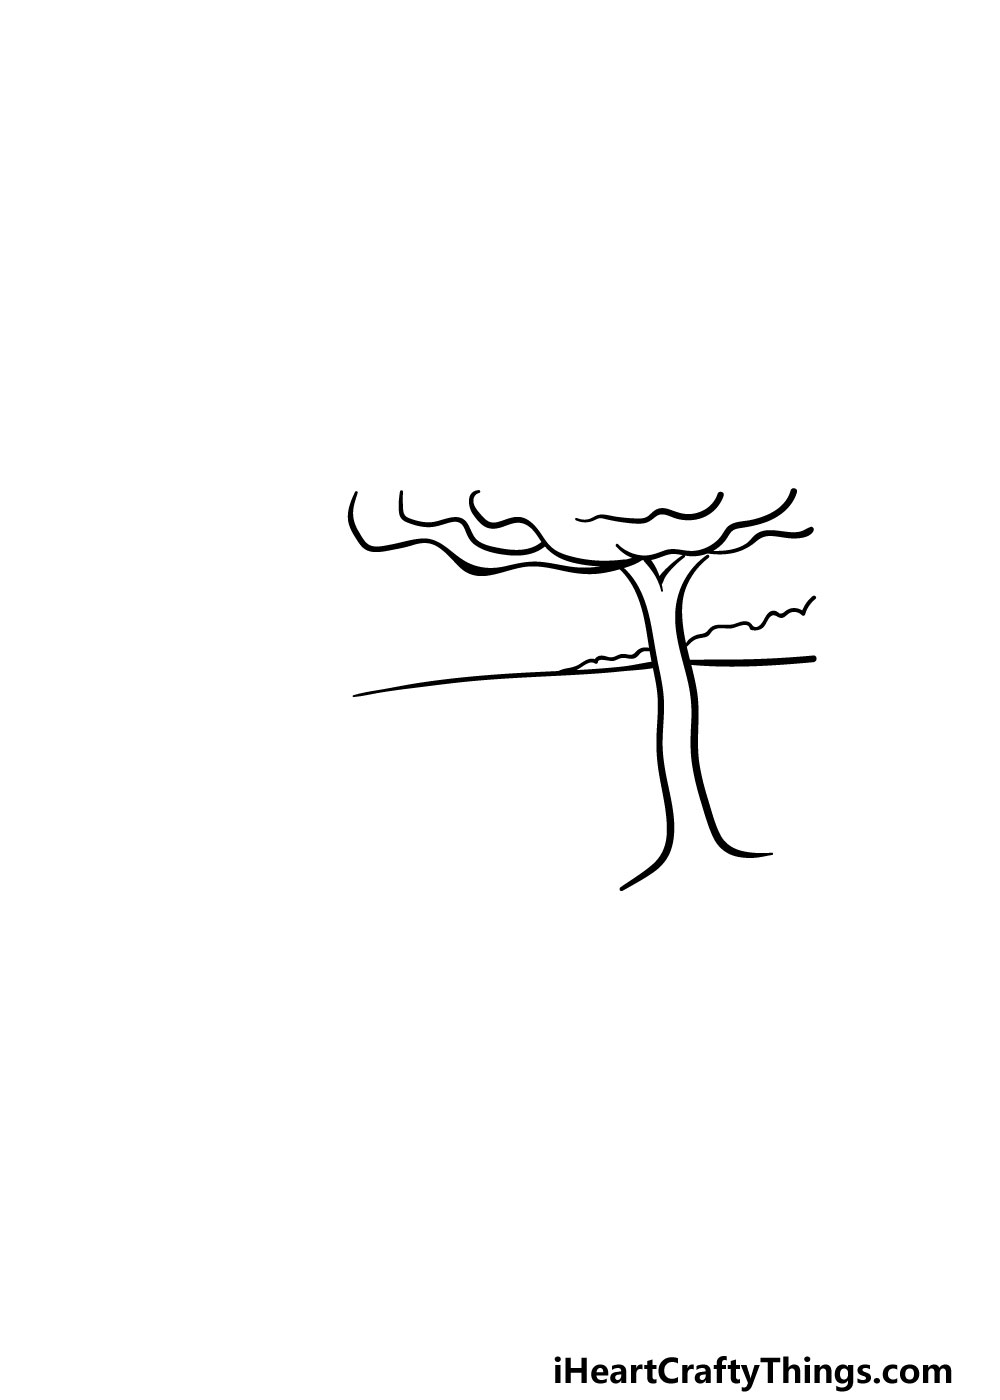
Step 2 – Add the Trunk to the Tree
Having drawn the tree's canopy, it's time to give it a sturdy trunk. Extend two curved lines downwards from the canopy, representing the tree's central trunk. At the top center, draw two more lines for the branches' fork.

Step 3 – Sketch the Background Landscape
Now, let's shift our focus to the serene landscape that serves as the backdrop for our river. A slightly curved line sweeping across the picture will form the base of the landscape, delicately crossing behind the tree. On the right side, use more curved and bumpy lines to depict bushes, adding texture to the scene.
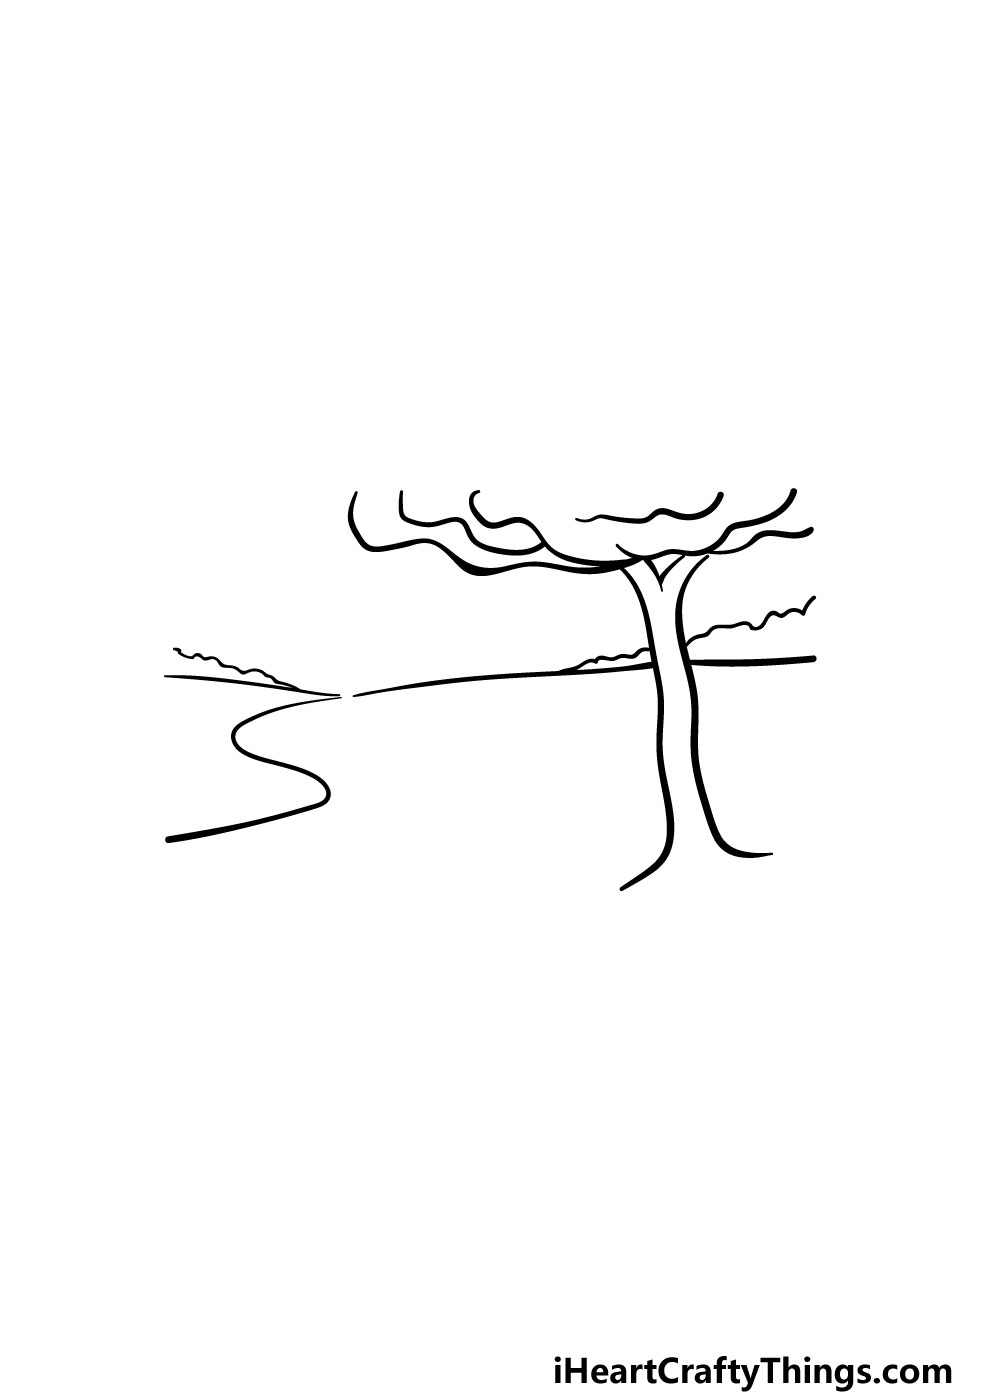
Step 4 – Begin Drawing the River
It's time to bring the river to life! With a confident stroke, draw a wavy line descending from the left-hand side, indicating the flow of the river. Connect it with a horizontal line, creating a natural pathway for the river. Above this line, add more bushes, enhancing the riverbank's charm.
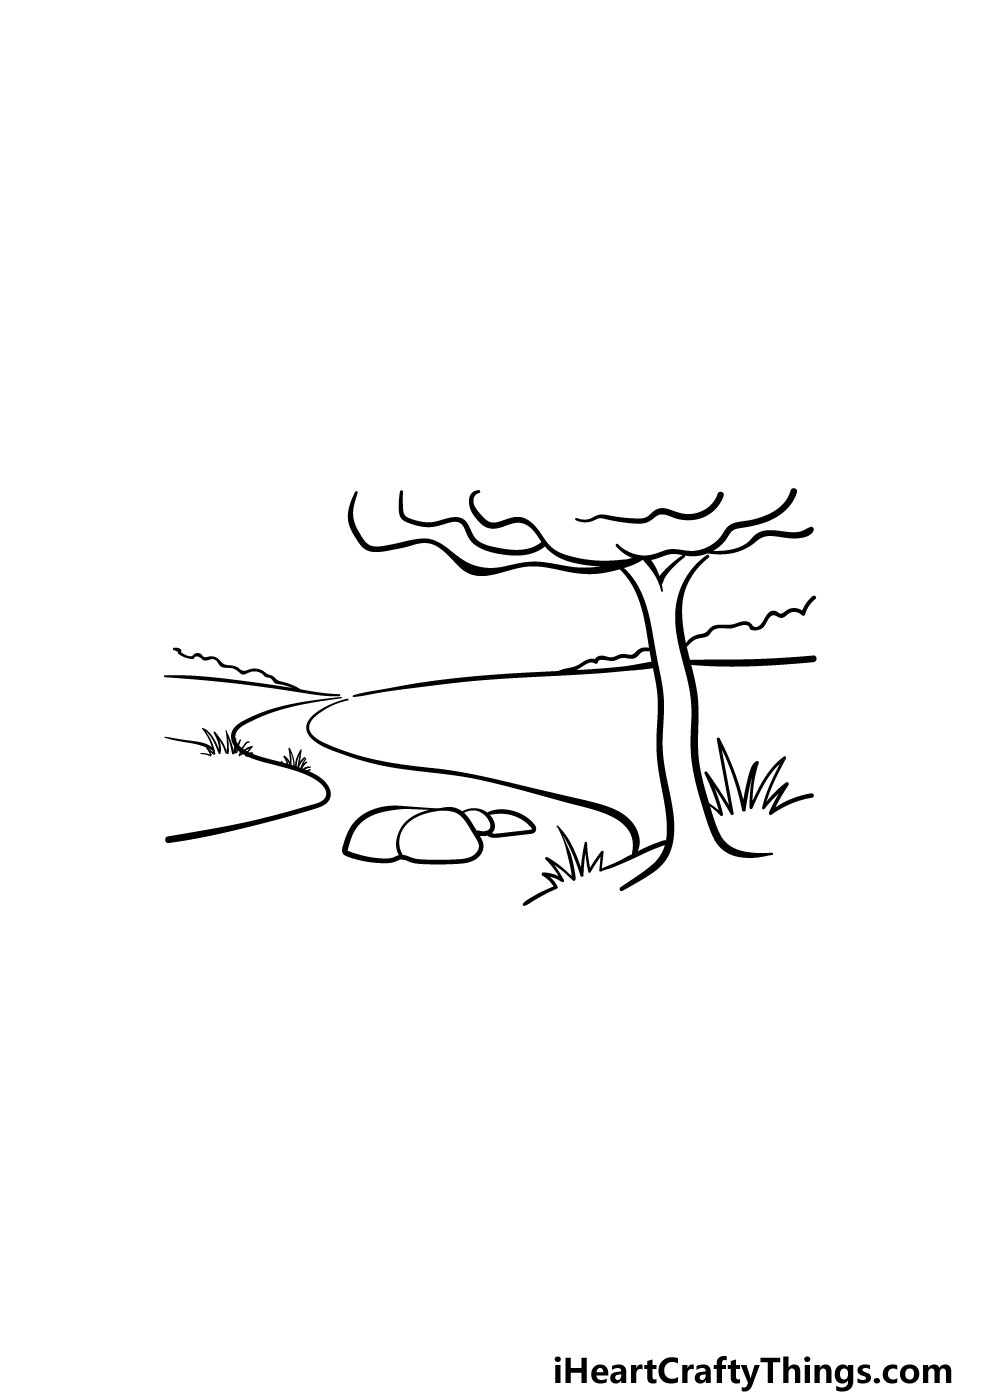
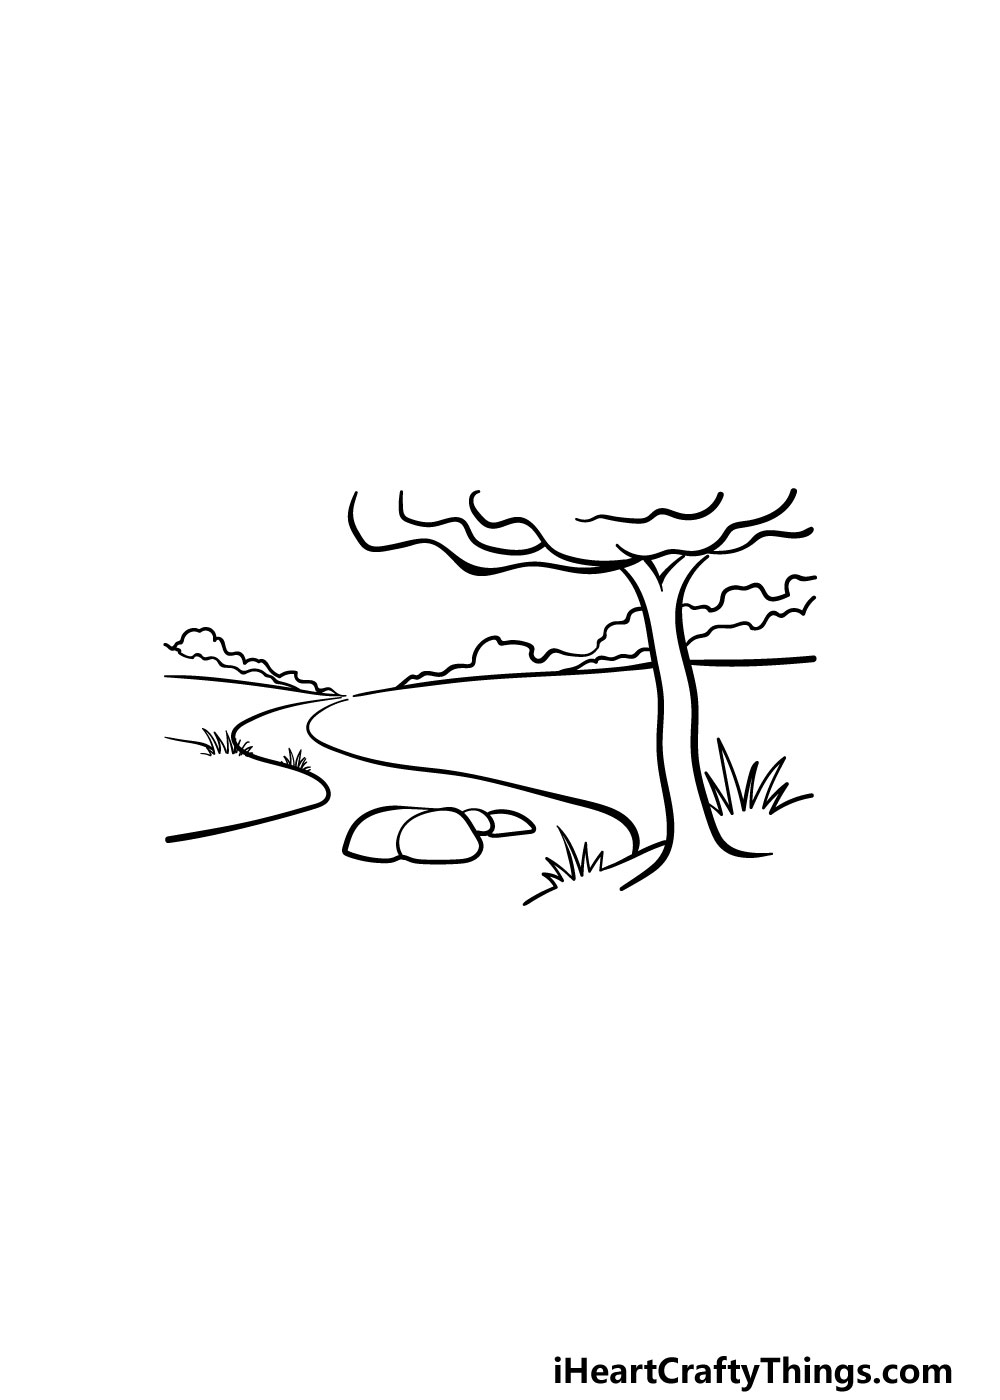
Step 5 – Add Details to the River
In this step, we'll add more intricate details to the river. Draw another wavy line descending from the right side, mirroring the one on the left. This completes both sides of the river. Now, let's add some finishing touches – use rounded shapes for large rocks in the middle of the river, and employ jagged lines to create grass around the riverbanks and at the base of the tree.
Step 6 – Enhance the Landscape
To enrich the landscape further, this step entails adding more treetops in the background. Use bumpy lines to give depth and character to the trees in the distance. Now, we're almost finished with the drawing!
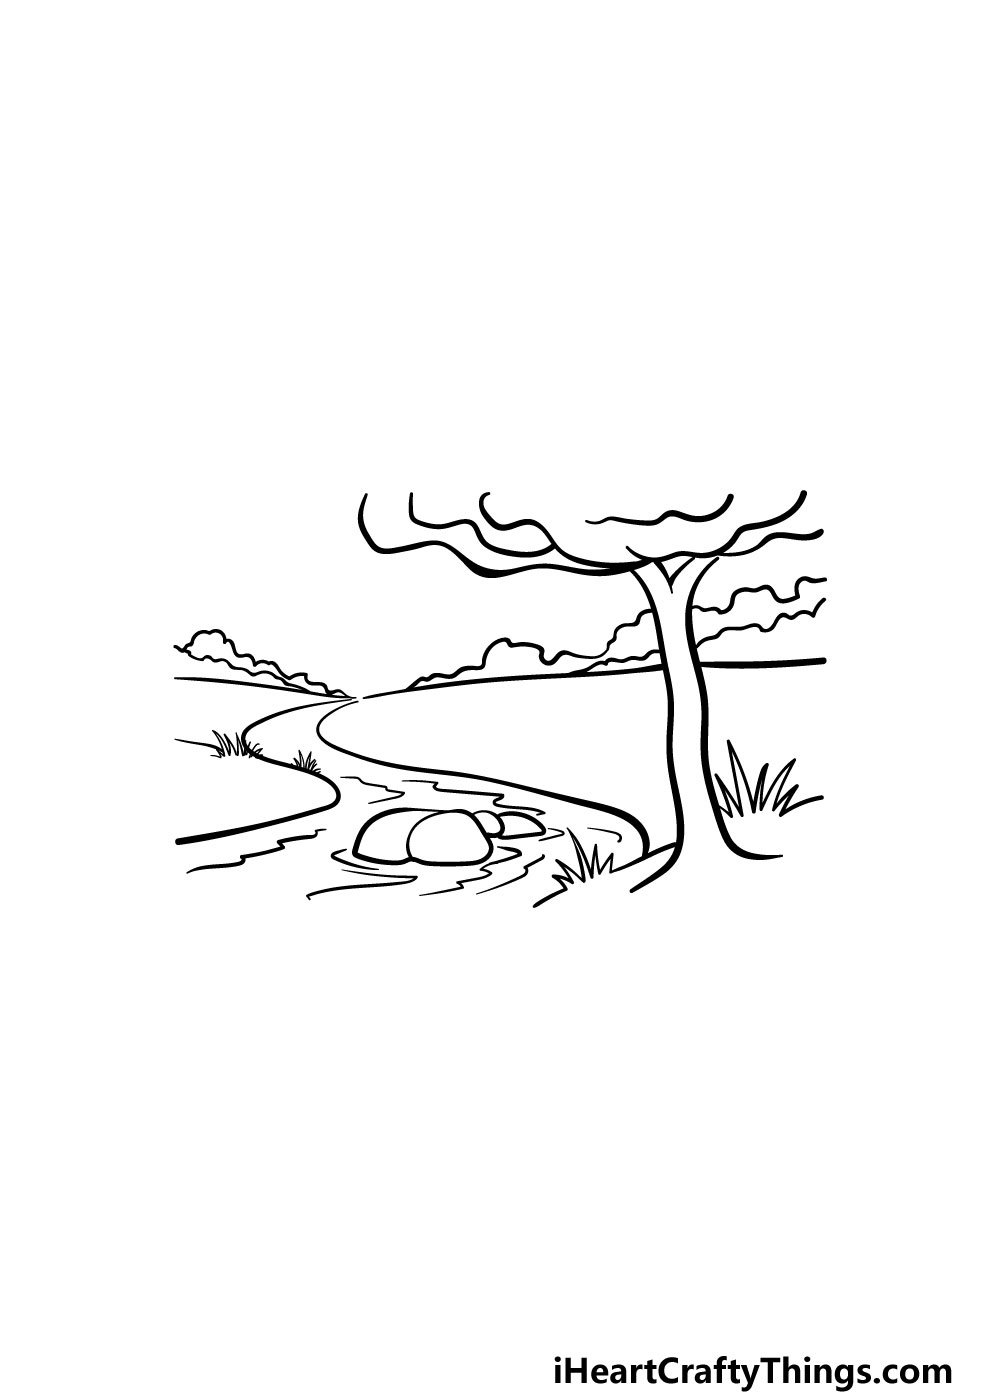
Step 7 – Finalize the Details
Before applying colors to your river drawing, let's add some final details. Give the river a sense of motion by incorporating wavy lines, creating the illusion of water flowing gently. Feel free to add any additional elements you wish, such as ducks, fish, or even a family leisurely enjoying the riverside. Unleash your creativity and make this artwork truly unique!
Step 8 – Color Your River Drawing
Now comes the moment to infuse your river drawing with vibrant colors. For our reference image, we opted for lovely greens, blues, browns, and greys. However, this is your chance to let your imagination soar. Experiment with different shades and combinations to create the atmosphere you desire. You can even depict different seasons by altering the colors you use. Feel free to explore various art mediums to add depth and texture to your masterpiece.

5 Tips to Enhance Your River Drawing
Now that you've completed your stunning river drawing, here are some tips to make it even better:
Add Small Details: Elevate your artwork by incorporating small details like fruits on the trees, fish in the river, or grass textures and bark on the tree. These nuances will bring your drawing to life.
Embrace Larger Elements: Consider enhancing your river scene by incorporating larger elements. Experiment with adding more trees, rocks, or wildlife to create a captivating composition.
Play with Weather Effects: Explore different weather settings and effects to transform the mood of your artwork. Whether it's a rainy day or a starry night, modifying the setting can give your drawing a whole new dimension.
Explore Color Palettes: Colors have the power to evoke emotions and set the ambiance. Select your hues wisely, as they can drastically alter the overall vibe of your drawing. Milder, darker colors are ideal for a rainy day, while brighter colors create a sunny atmosphere.
Experiment with Art Tools and Mediums: Don't hesitate to push the boundaries of creativity by using various art tools and mediums. Watercolors offer a soft and delicate feel, while colored pens and markers provide intense and vibrant colors. Explore different combinations to achieve the desired visual effect.
Express Your Creativity with Shill Art
Congratulations! You've successfully completed this guide on how to draw a river. We hope you enjoyed this creative journey and that it has inspired you to further explore your artistic potential. Don't hesitate to add your own personal touches and elements to make the artwork uniquely yours.
Remember, at Shill Art, we believe in embracing creativity and self-expression. We invite you to visit our website for more exciting guides and inspiration. Share your incredible river drawing on our Facebook and Pinterest pages, as we eagerly await the opportunity to witness your remarkable talent.
Follow us on:
More Coloring Books available at Shill Art – Express Your Creativity. Unleash your imagination and embark on endless artistic adventures.
Follow us on:
- Facebook fanpage:https://www.facebook.com/ShillArt.Official
- Facebook group:https://www.facebook.com/groups/FreeColoringPagesToPrint
- Pinterest:https://www.pinterest.com/ShillArtOfficial
More Coloring Books at here, see now:https://shillart.com/coloring-books