
Origami is a fascinating art form that allows you to transform a simple piece of paper into intricate shapes. Today, we'll show you how to make a classic ninja star using origami techniques. Get ready to express your creativity and have some fun!
The Basics of Ninja Stars
Ninja stars, also known as shuriken, are famous Japanese weapons that have captured the imagination of many. They come in various sizes and shapes, but we'll be focusing on a basic 4-pointed ninja star. The best part is, you only need two origami sheets to create this masterpiece.
If you don't have origami paper handy, don't worry! You can use regular craft paper or construction paper as an alternative. Now, let's get started on this exciting origami craft.
Materials Required
- Origami sheet
OR - Construction paper (cut into 15cm squares)
Step-by-Step Instructions

- Take two origami sheets or square construction paper pieces measuring 15cm each.
2-3. Fold both papers in half horizontally. - Make a crease.

5-6. Fold both papers in half again and make creases.
7. Unfold all the folds and spread them open.
8-9. Fold the top and bottom edges towards the center, using the earlier creases as a reference.

- The paper model should now take shape.
11-12. Repeat the same folding steps with the second piece of paper.

15-16. The paper models should resemble this pattern.
17-18. Fold the papers from left to right (or right to left) and make a crease.

- Fold both papers as shown in the picture.
- Unfold.
21-22. Hold the paper as displayed and fold the left edge at a 90-degree angle towards the top. Make a crease.
When folding upwards, make sure to fold along the vertical crease in the middle. Do not fold beyond the crease we made in step 19.

23-24. Similarly, fold the right edge at a 90-degree angle downwards and make a crease.
25. For the second piece of paper, fold the right edge in the opposite direction.
26. Fold the left edge at a 90-degree angle towards the bottom.
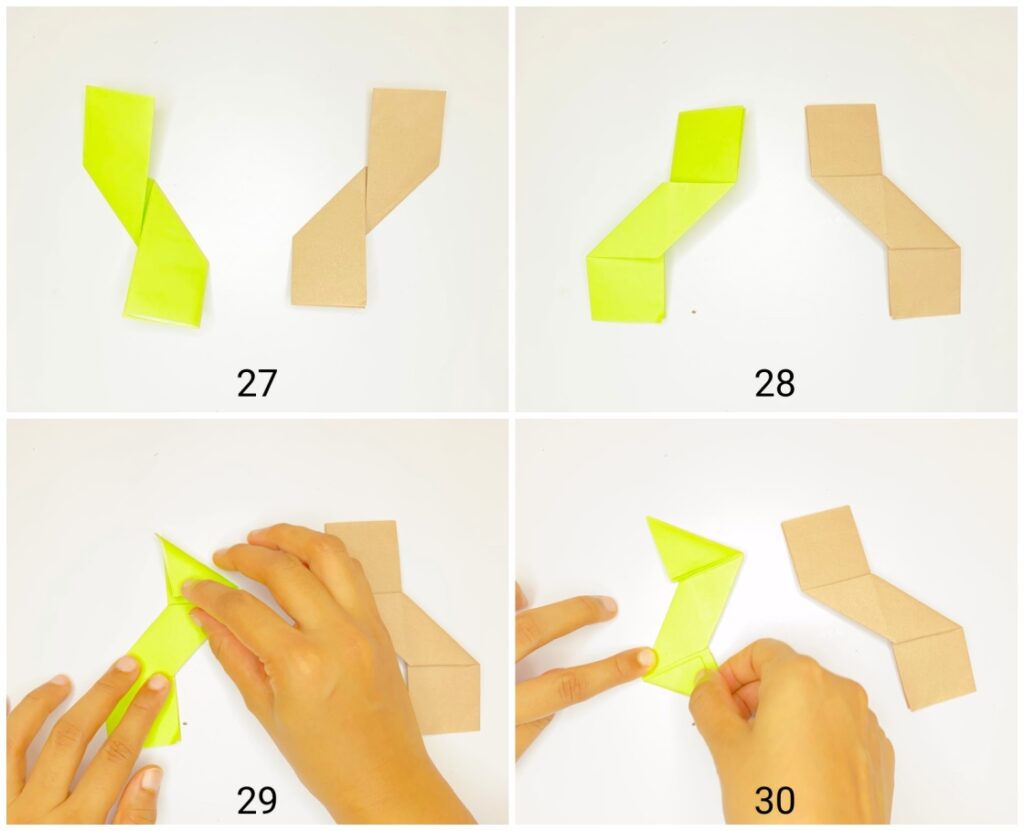
- Now, both papers should mirror each other.
- Flip both papers over.
- On the green paper, fold the top right corner towards the bottom left corner to form a triangle.

- Similarly, fold the bottom left corner towards the top right corner to form another triangle.
31-33. Repeat the same steps with the second piece of paper.

35-38. To simplify the final folding, fold the triangular pieces towards the center and make creases, as shown in the pictures.

- Hold the paper pieces as demonstrated in the picture, with the green piece facing forward and the brown piece facing backward.
- Place the brown piece on top of the green piece.

- Locate the pocket on the right side of the brown paper piece and open it.
43-44. Insert the top triangular portion of the green paper piece into the pocket of the brown paper, as shown. - The completed image should look like this.
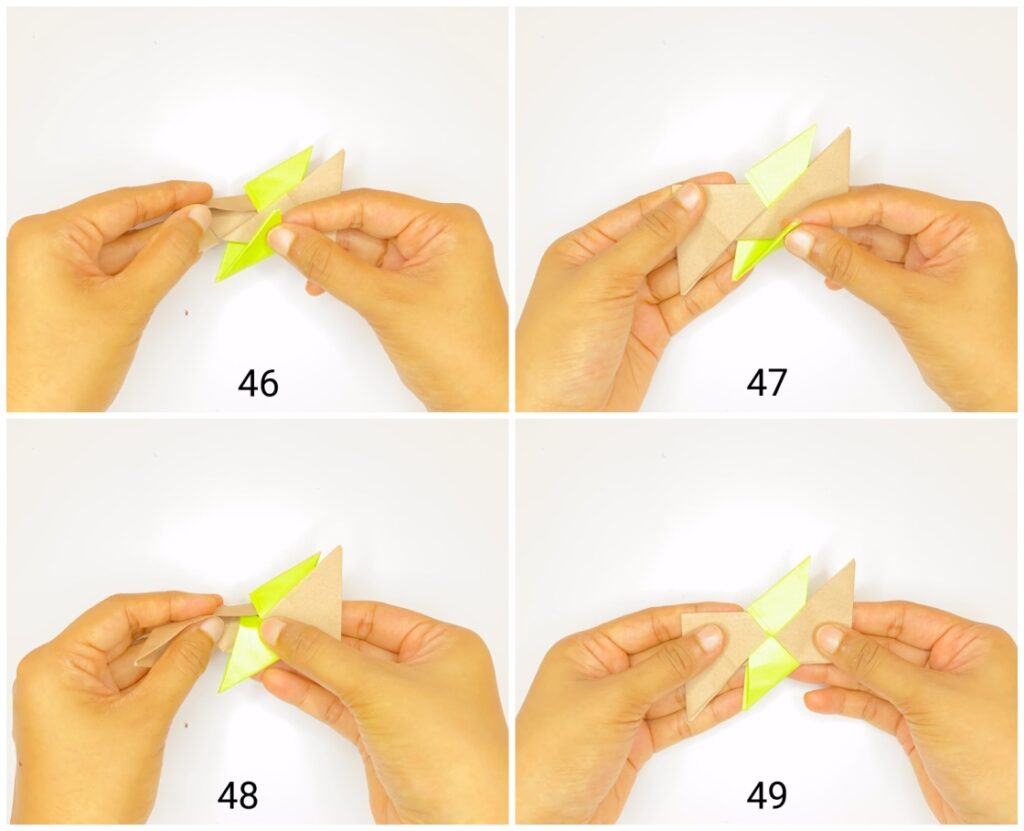
46-48. Insert the bottom triangular portion of the green paper piece into the left pocket of the brown paper.
49. The completed image should now resemble a ninja star.

- Flip both papers over together.
51-53. Insert the right corner of the brown paper into the top pocket of the green paper.

54-55. Insert the left triangular corner of the brown paper into the bottom pocket of the green paper.
56. Congratulations! Your paper ninja star is now complete.
Have fun experimenting with different colors and designs. Let us know in the comments below how it went for you. If you need any further guidance, check the step-by-step video tutorial below.
Video Tutorial for Making an Origami Ninja Star
In case you have any doubts about any steps, feel free to watch the detailed video tutorial below. Don't forget to subscribe to our YouTube channel for more craft ideas every week.
More Craft Tutorials
If you enjoyed making the paper ninja star, you'll love exploring other craft tutorials as well. Here are a few more ideas to get you started:
- How to make paper leaves step-by-step
- How to make a 3D paper apple step-by-step
- Easy paper puzzle game for kids
- Ice cream popsicle craft (with a free template)
- How to make a paper corner bookmark (5 cute corner bookmark tutorials)
Remember, at Shill Art, we're here to help you express your creativity and have fun through art. Visit our website Shill Art – Express Your Creativity and join our community of craft enthusiasts today. Happy crafting!
Follow us on:
- Facebook fanpage:https://www.facebook.com/ShillArt.Official
- Facebook group:https://www.facebook.com/groups/FreeColoringPagesToPrint
- Pinterest:https://www.pinterest.com/ShillArtOfficial
More Coloring Books at here, see now:https://shillart.com/coloring-books