
Creating paper versions of everyday objects is not only enjoyable but also encourages kids to think creatively. Whether it's food, animals, or nature, replicating them with paper requires problem-solving skills and boosts hand-eye coordination. By following tutorials and engaging in arts and crafts activities, children can learn how to make things and even develop their own imaginative creations. In this step-by-step tutorial, we will show you how to make a 3D paper apple using construction paper.
Before we dive into the tutorial, we invite you to check out our YouTube channel and subscribe to it. We upload new craft tutorials every week, guaranteeing endless inspiration!
Materials Required:
To make a paper apple, you will need the following materials:
- Construction paper
- Compass and pencil
- Scissors
- Glue
- Black colored marker

Step 1: Start with the Construction Paper
Begin by choosing a red construction paper to resemble the color of an apple.
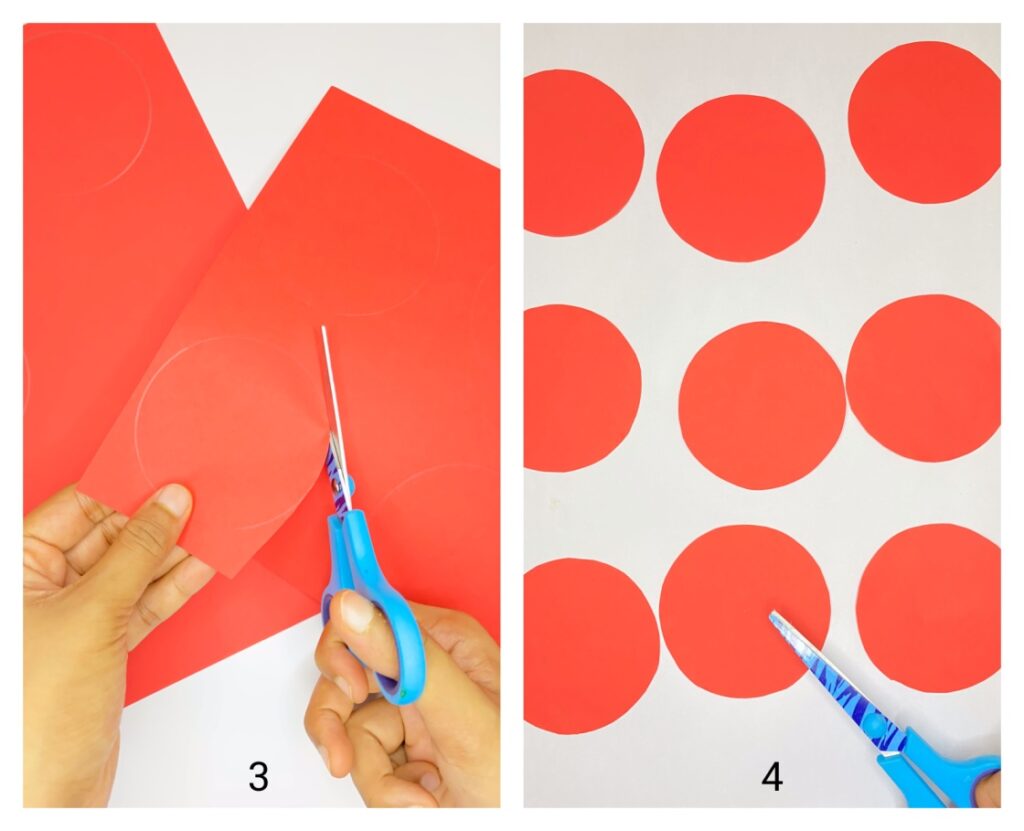
Step 2: Draw and Cut Circles
Using a compass and pencil, draw nine small circles with a radius of 4 cm. Cut along the outlines to create individual circles.
Step 3: Create Semi-Circles
Fold each circle in half, creating semi-circles.
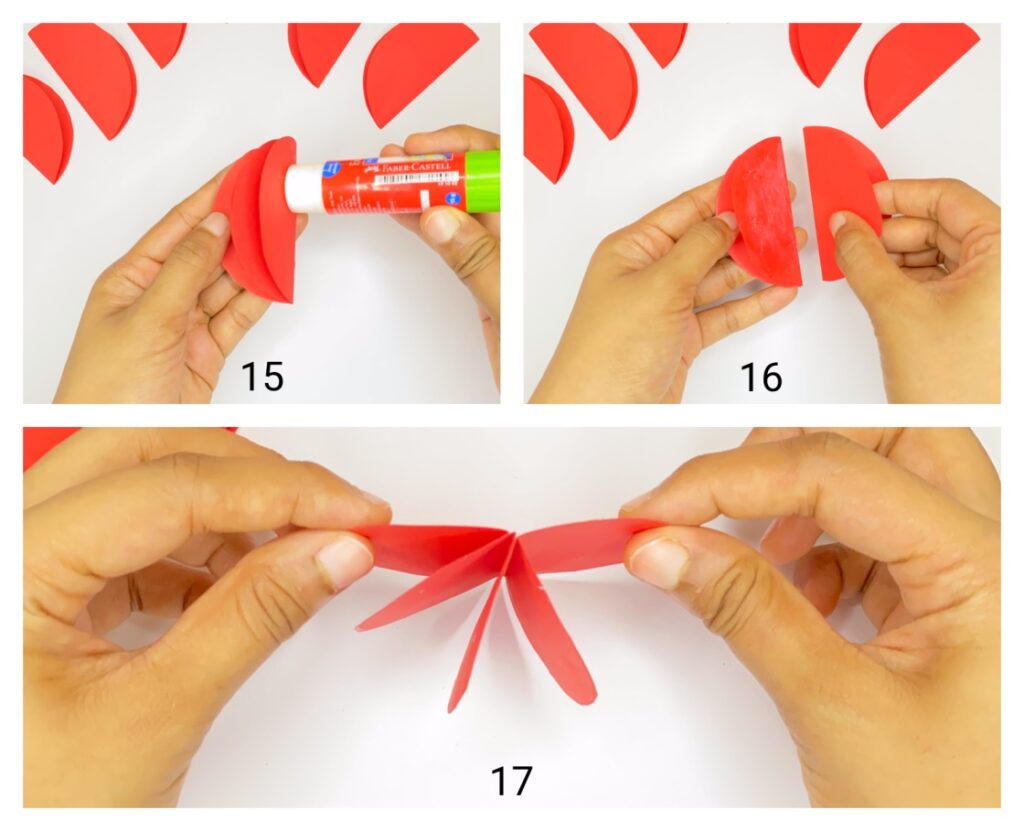
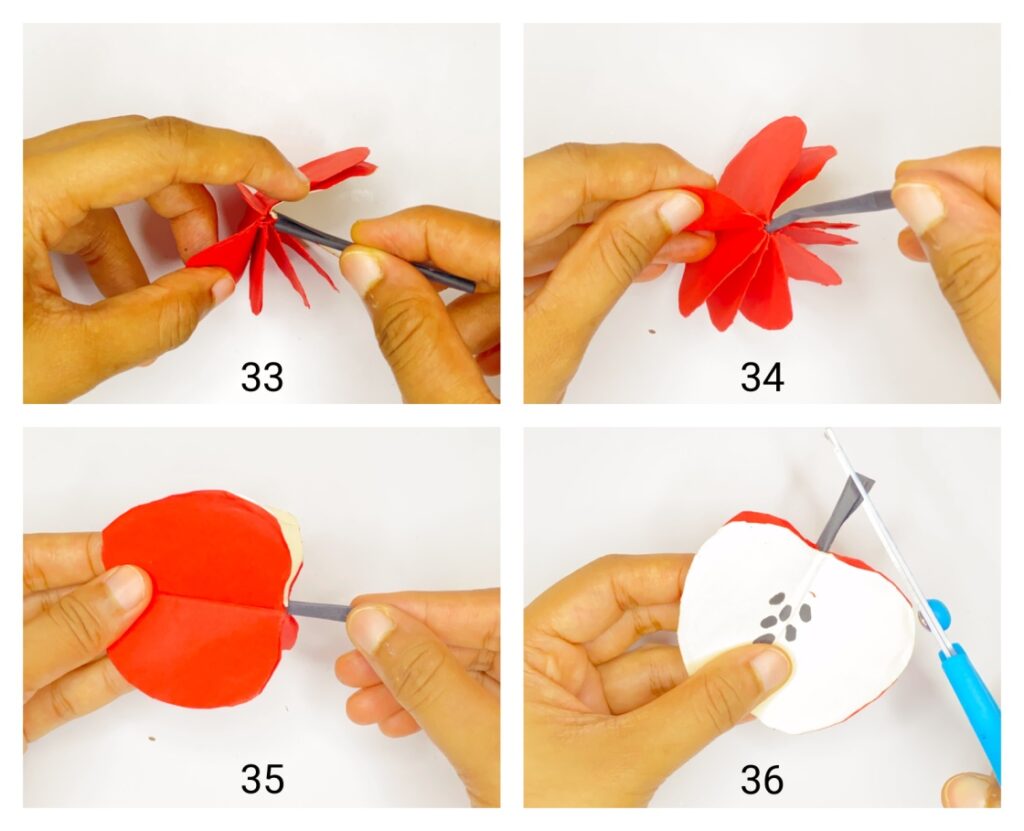
Step 4: Arrange and Stick Semi-Circles Together
Stack the semi-circles on top of each other, sticking them together one-by-one. Apply glue to one side of each semi-circle and press the ends together to ensure they are securely stuck.
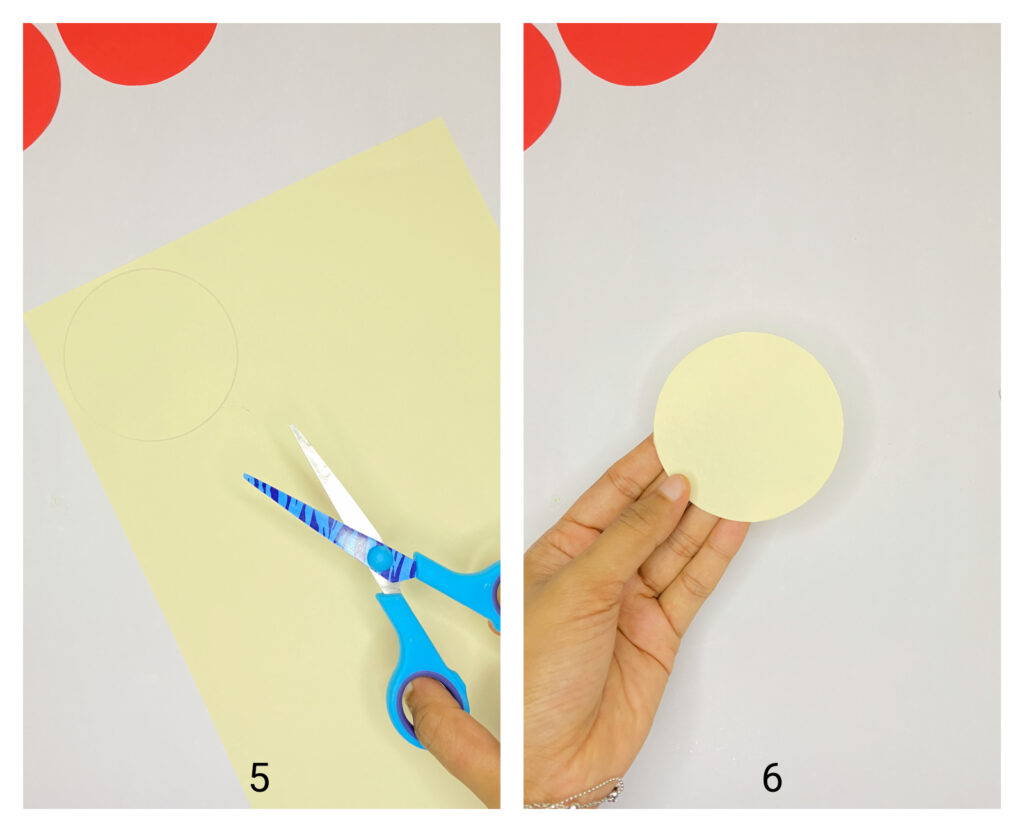
Step 5: Add the Yellow Flesh
Take a light yellow colored sheet and draw a circle with a radius of 4 cm. Cut it out and attach it to one end of the red semi-circle stack. This will represent the flesh of the apple.

Step 6: Shape the Apple
To make the paper apple look more realistic, shape it by drawing an outline that resembles an apple. Cut along the outline to give it the desired shape.
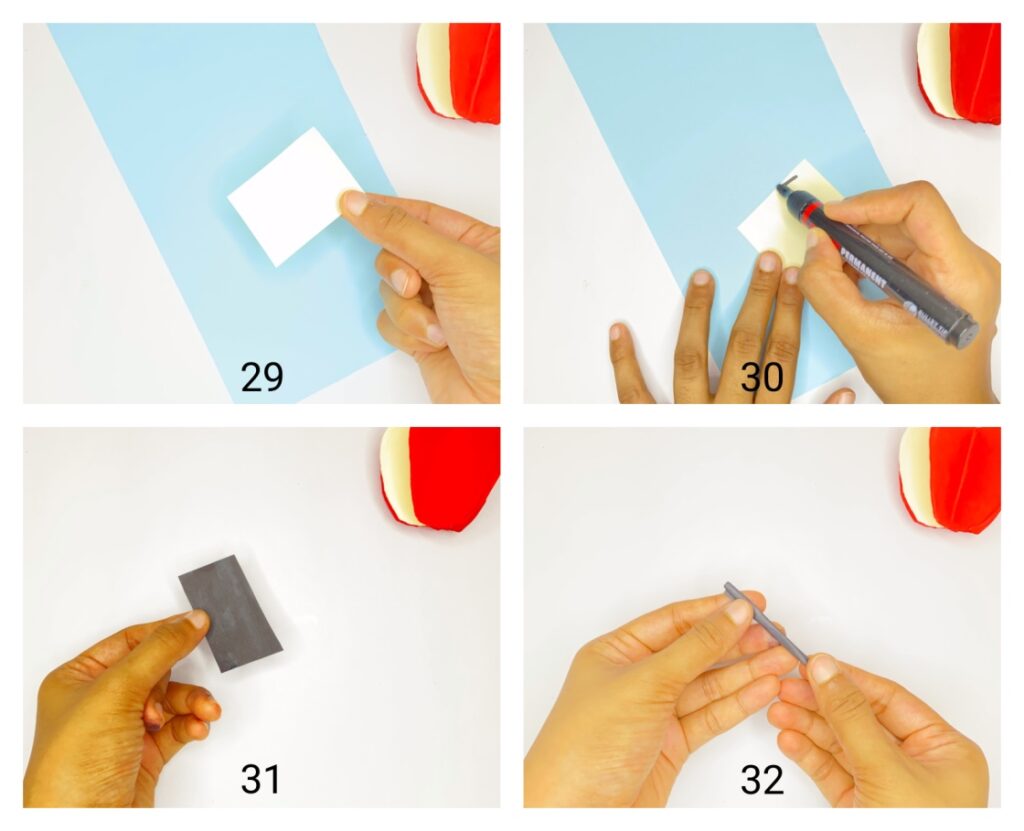
Step 7: Add the Stem
Cut a small rectangular piece of paper to make the stem of the apple. Roll it thinly and insert it into the hole at the top of the apple. Ensure it is inserted securely and trim the tip in a slanting manner.
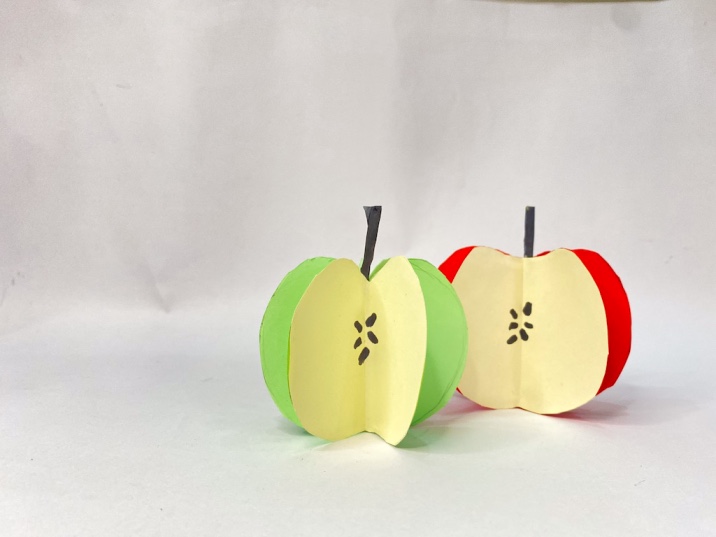
And there you have it! Your 3D paper apple is complete.
For a more detailed visual guide, check out our step-by-step video tutorial below:
More Craft Tutorials:
- Easy summer ice cream popsicle craft (with free template)
- How to make paper fish step-by-step
- Easy paper plate flower garden wreath (with free template)
- DIY easy paper puzzle game for kids
- How to make an Origami paper vase at home
Express your creativity and stay inspired by following us on:
- Facebook fanpage: Shill Art – Express Your Creativity
- Facebook group: Free Coloring Pages to Print
- Pinterest: Shill Art Official
For more coloring books and inspiration, visit Shill Art – Express Your Creativity. Let your imagination soar!
Now, grab your construction paper and start creating your very own paper apple masterpiece. Have fun and enjoy the creative process!
Follow us on:
- Facebook fanpage:https://www.facebook.com/ShillArt.Official
- Facebook group:https://www.facebook.com/groups/FreeColoringPagesToPrint
- Pinterest:https://www.pinterest.com/ShillArtOfficial
More Coloring Books at here, see now:https://shillart.com/coloring-books