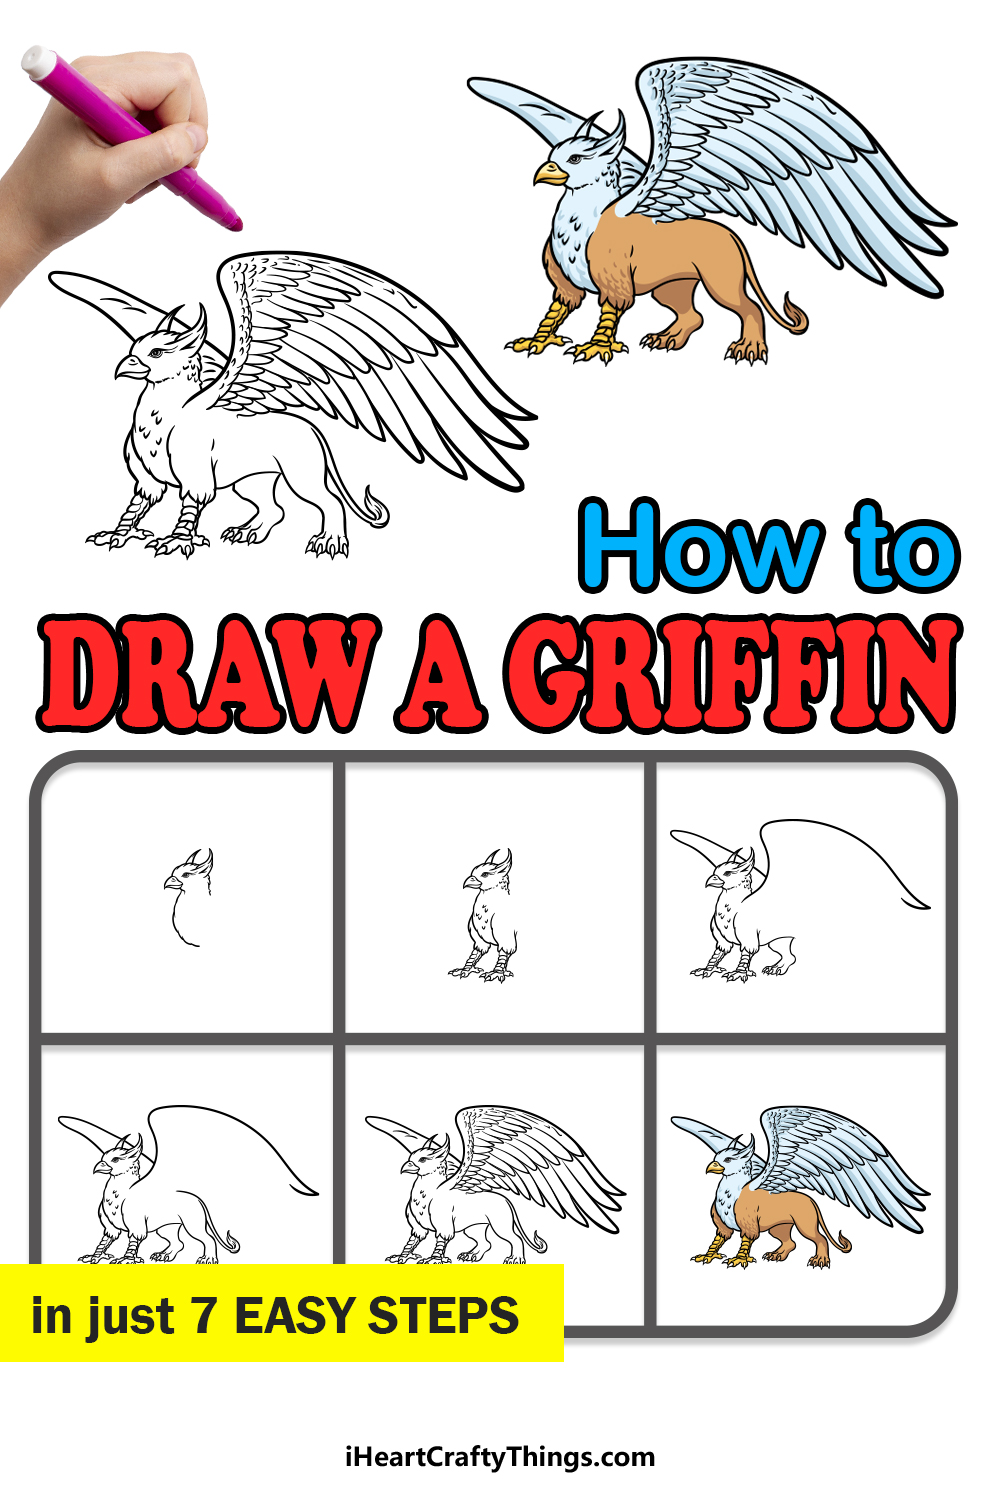
There's a world filled with extraordinary creatures and fantastical beasts across various legends and mythologies. Among them, the mighty griffin stands tall, believed to have originated from Greek and Roman mythology. The griffin, with the body of a lion and the head, wings, and talons of a giant eagle, is undeniably cool and captivating. However, learning how to draw a griffin can be a bit tricky. But fear not! This step-by-step guide will show you just how fun and easy it can be!
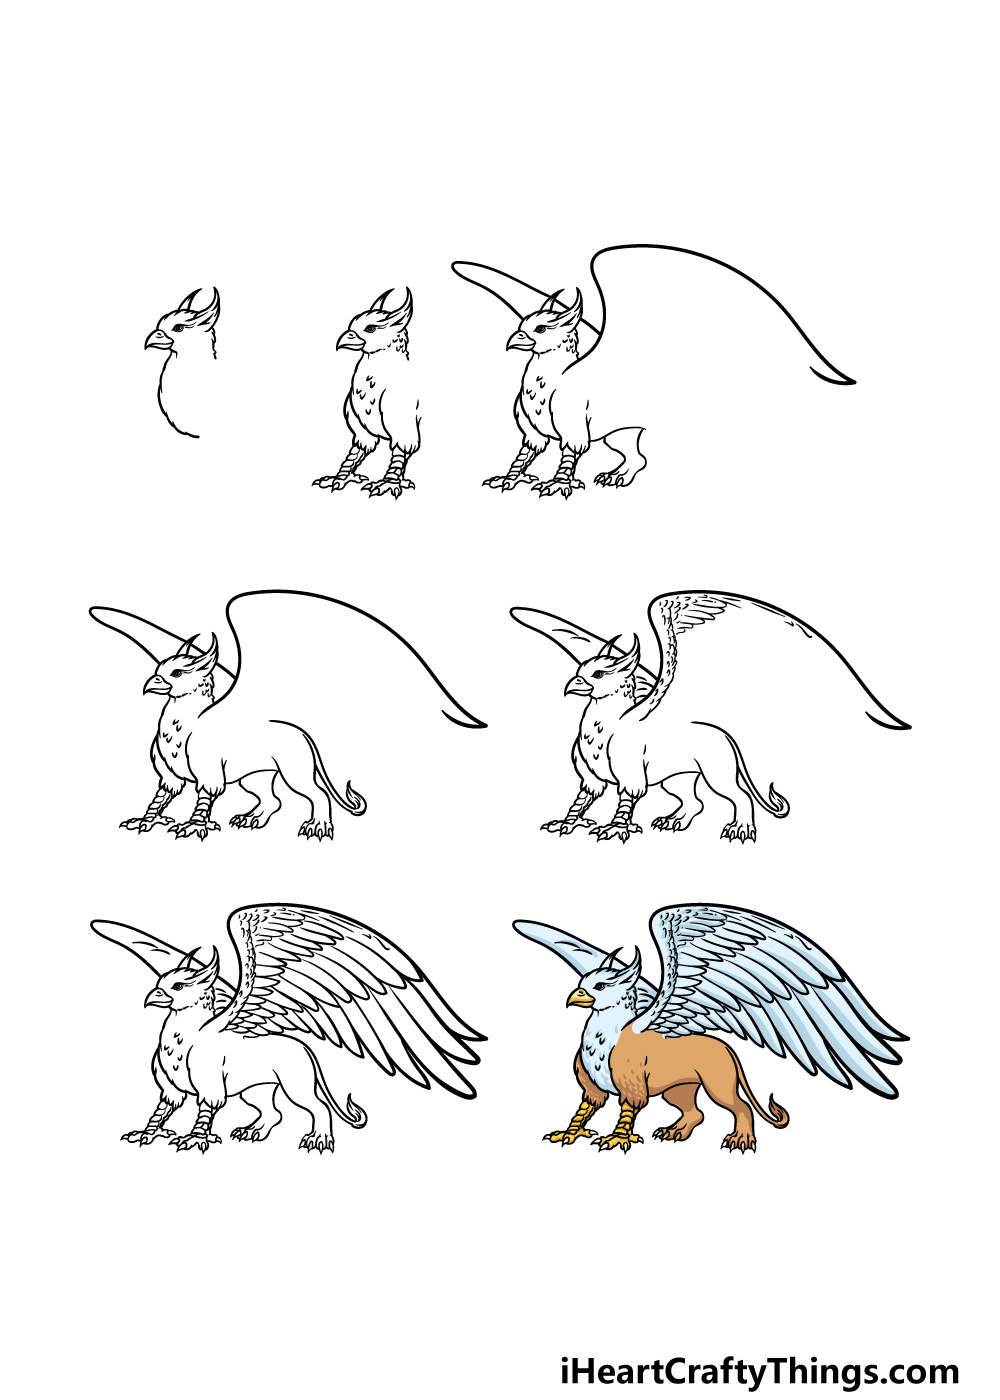
Let's Get Started!
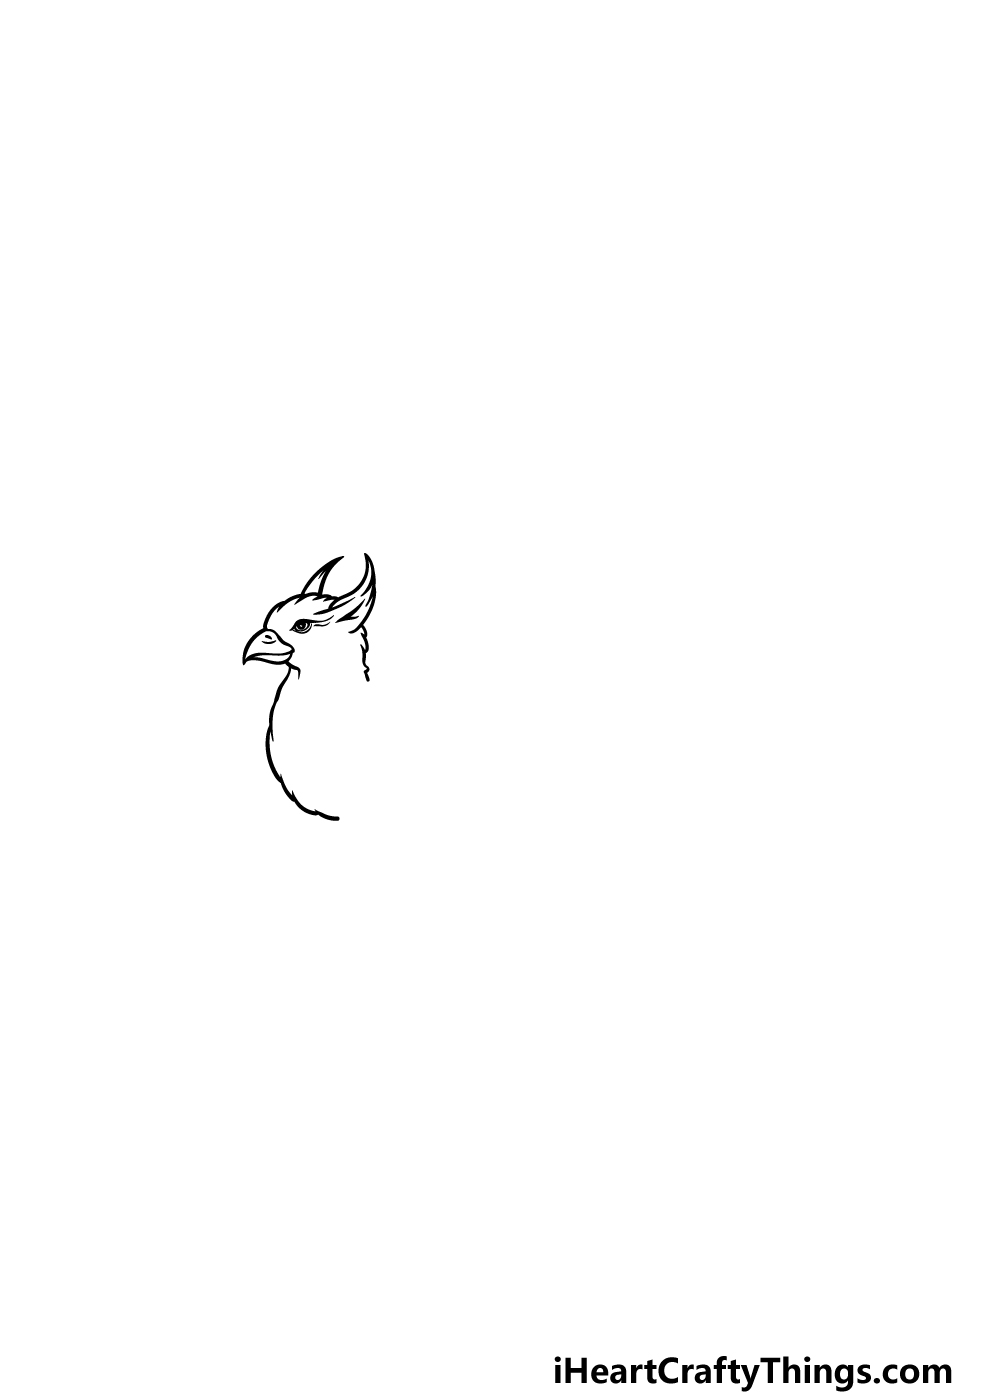
Step 1 – Drawing the Head and Beak
To begin your encounter with the griffin, we'll first draw its magnificent head and beak. Use bumpy lines to outline the head and neck, giving it a softer, feathery texture. Then, add some curved lines, ending in a pointy tip, to shape its sharp beak. Don't forget to depict the griffin's eyes and two pointy feathers atop the head. With this step complete, let's move on!
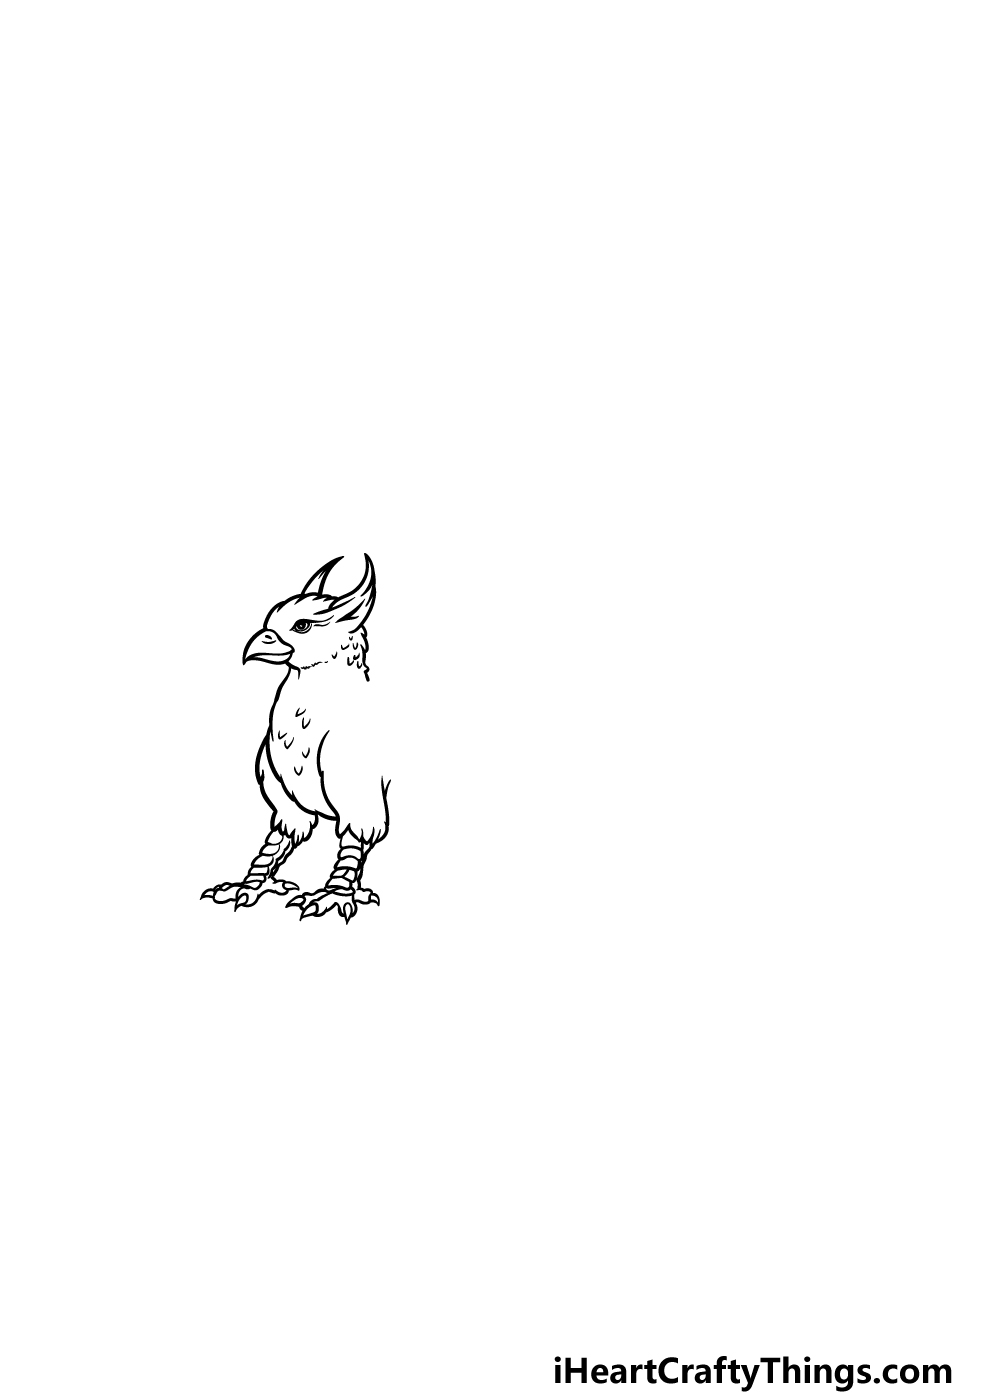
Step 2 – Adding the Front Legs and Feather Details
Continuing our artistic journey, we'll now add the front legs to our griffin. These legs resemble those of a lion but culminate in sharp talons. Use bumpy lines to fashion the rounded, feathery tops of the legs, as shown in our reference image. Connect small shapes to form the wrinkly legs, and don't forget the clawed talons. Bravo! Onward to the next step!
Step 3 – Let Wings Unfold
Griffins are renowned for their impressive wings, and it's time to bring them to life. In this step, we'll focus on drawing the front part of the wings. Start by extending a curved line upward and backward from the base of the head. This wing should have a magnificent size, as shown in the reference image. Add another curved line on the other side to outline the second wing. Finally, draw another leg beneath, and sprinkle feather details on the chest. Great job so far!
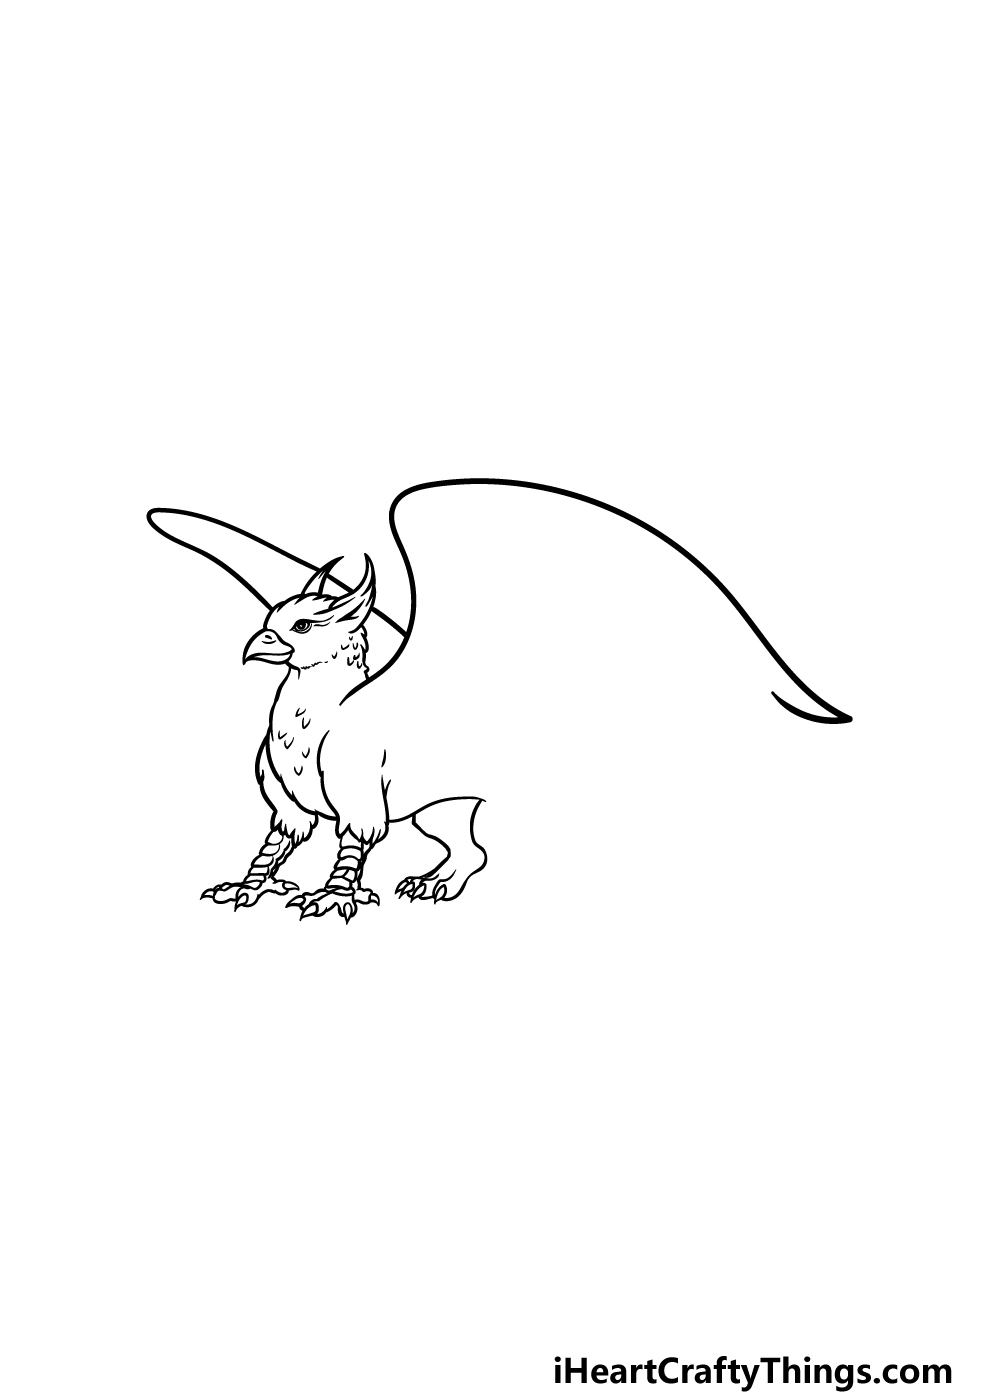
Step 4 – Sketching the Final Leg and Body
Our griffin is taking shape with each passing moment. In this step, draw the final back leg for the creature. Use curved lines to depict the leg next to the existing one, and let it connect to the rest of the griffin's back. The tail should flow gracefully from the back leg. Notice the space between the wing and the back of the griffin—it will soon be filled. Exciting times lie ahead!

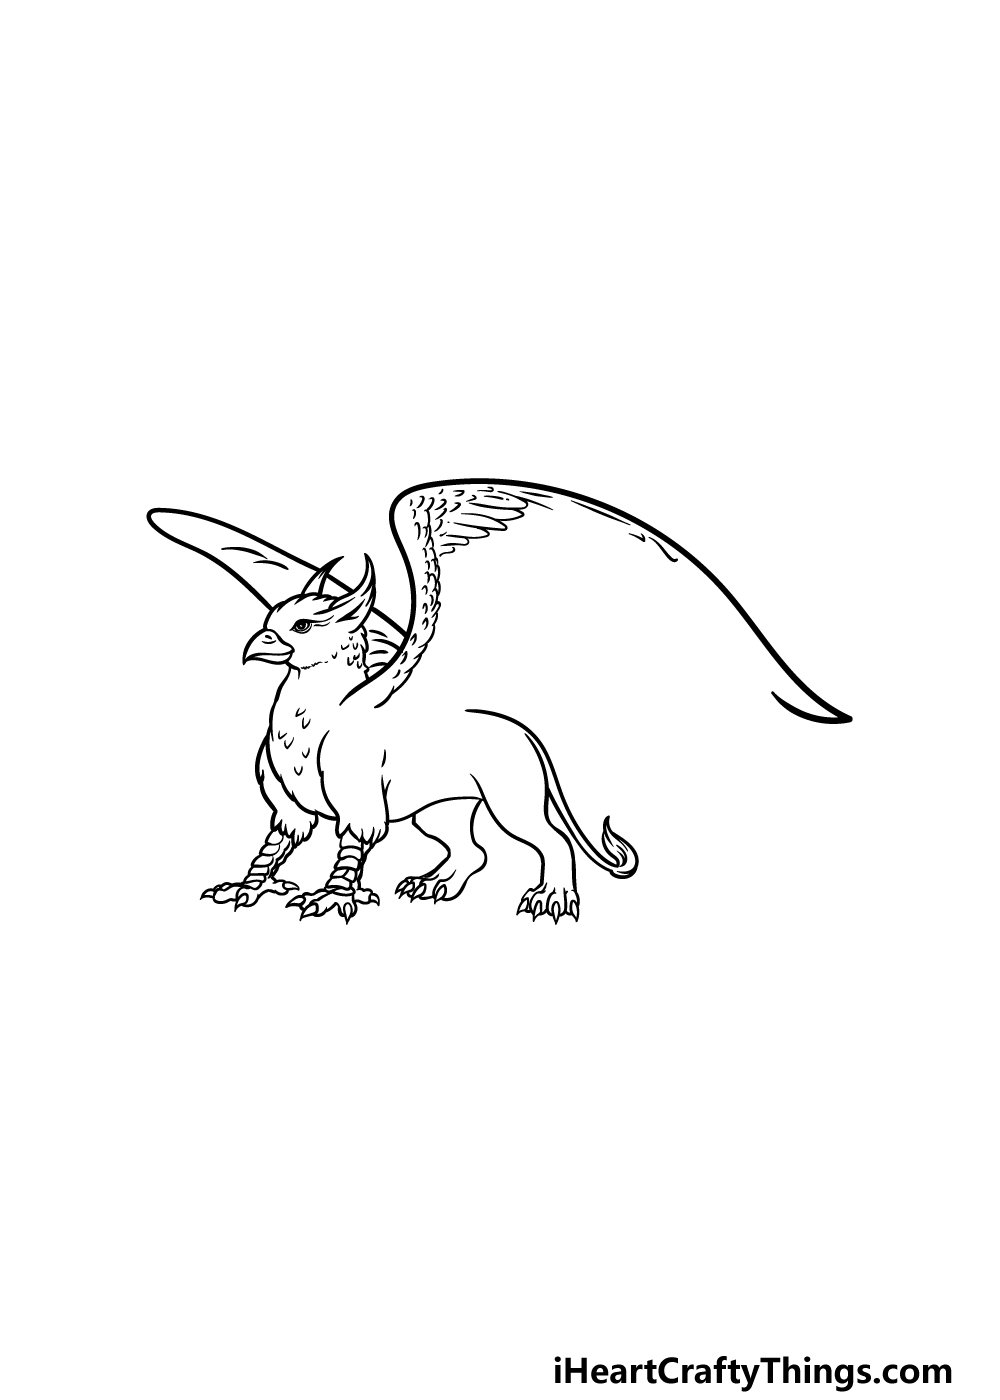
Step 5 – Adding Wing Details
As we near the final stages of the griffin's creation, it's time to add captivating details to its wings. Draw numerous curved lines along the front edge of the wings, creating a feathery texture. As you approach the top of the wings, let the lines become larger and longer to simulate larger feathers. With this step complete, we're nearly there!
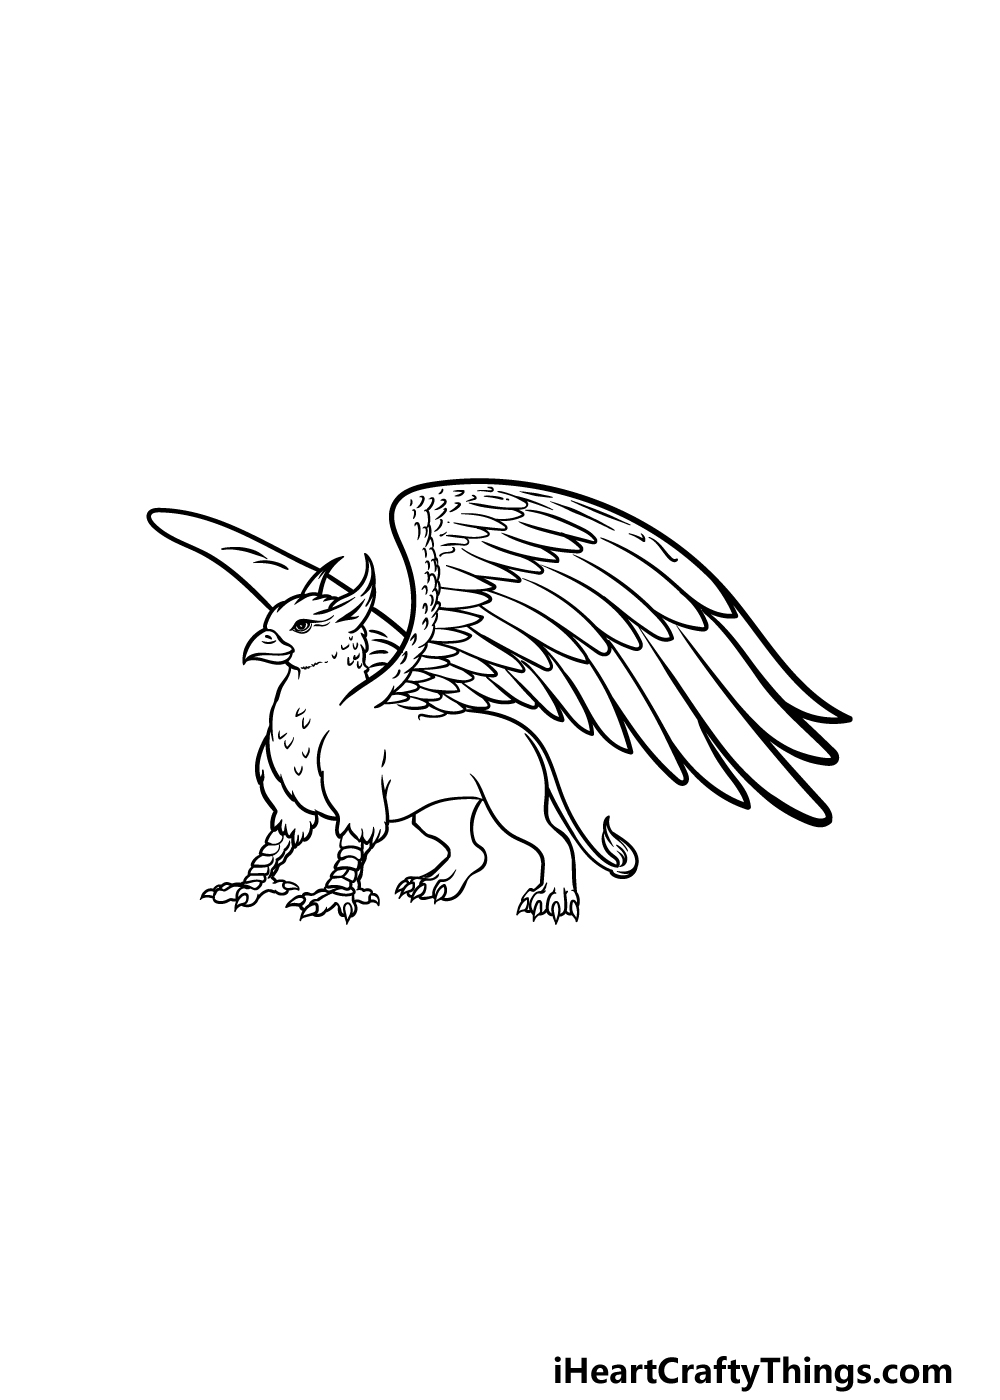
Step 6 – The Finishing Touches
You're on the cusp of completing your griffin masterpiece! In this step, draw more feathers to finalize the wings. Utilize long, curved lines to create larger feathers that fill the remaining space between the body and the wing. Let your imagination soar as you add any additional details and elements that come to mind. Consider a captivating background or enthralling mythological creatures to accompany your griffin. The choice is yours!
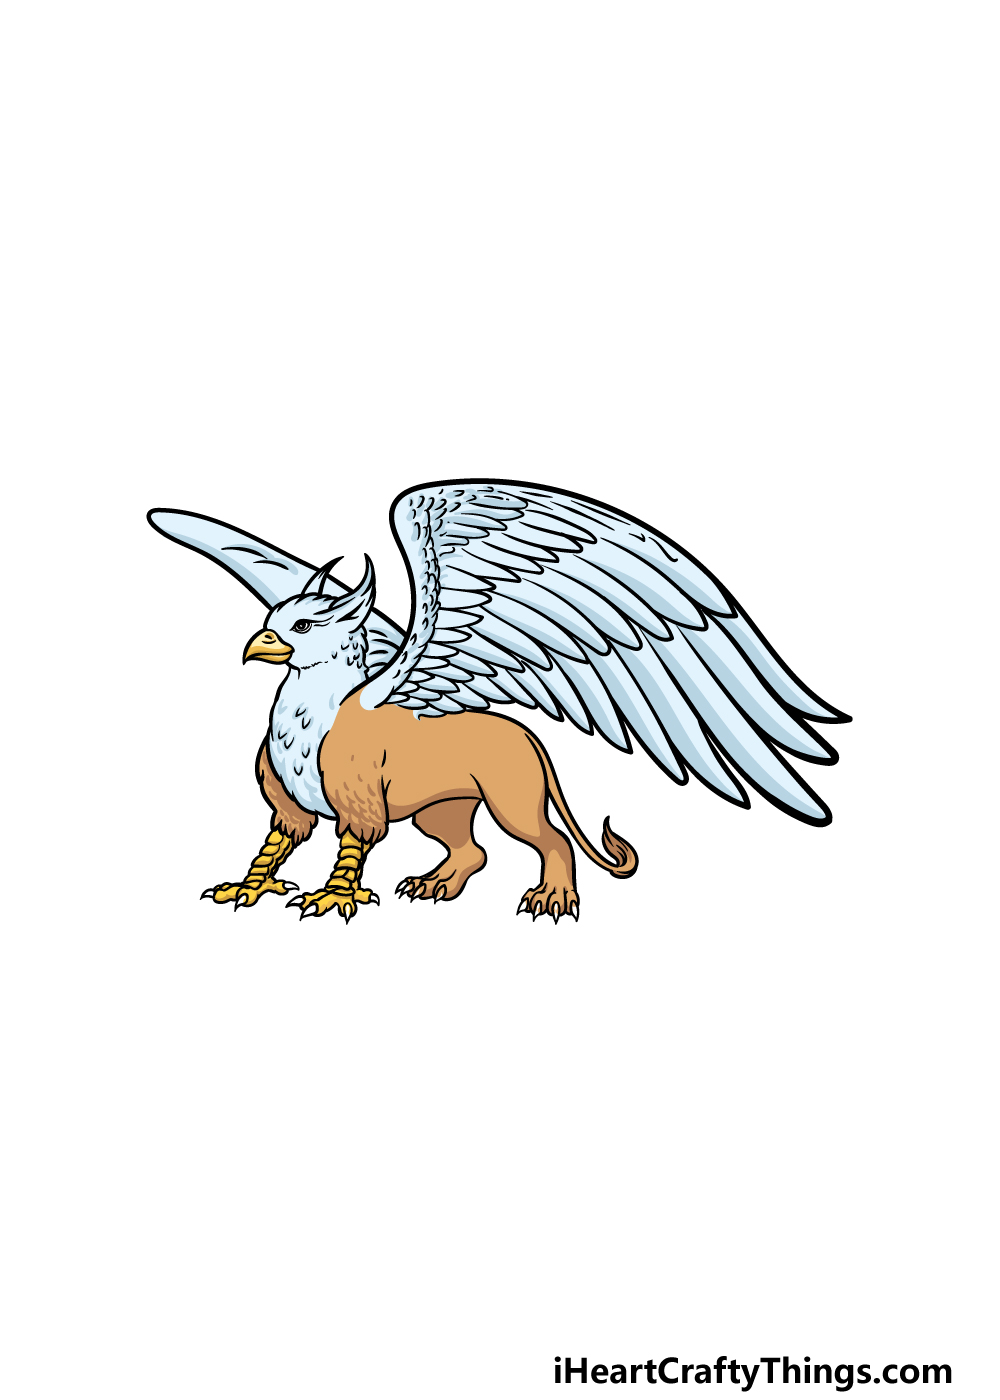
Step 7 – Adding Colors to Bring Your Griffin to Life
Welcome to the final step of our griffin-drawing adventure! Now is the time to infuse your creation with colors. In our reference image, we used a light, tan brown for the lion portions of the body. Yellow was employed for the eagle-like parts of the legs and beak, while light blues and greys adorned the feathers on the head and neck. Feel free to experiment with your own color choices and art mediums. The possibilities are endless!
Taking Your Griffin Drawing to New Heights
Congratulations! Your griffin drawing is now complete. But why stop there? Let's explore how you can make your artistic creation even more majestic with these fun and easy tips:
- Add texture lines to the wings and body, using small, curved lines to simulate fur and feathers, enhancing the griffin's realism.
- Personalize your griffin by making small changes—for example, altering its head's direction or adjusting the wings' position. Explore bird wing references for inspiration.
- Elevate your artwork by incorporating a captivating background. Let your imagination run wild, creating the fantasy setting of your dreams.
- Expand your mythological universe by introducing additional creatures to your griffin drawing. Unicorns, dragons, and basilisks are just a few examples. Seek online inspiration for their portrayal.
With these tips, your griffin will transcend imagination and become a masterpiece truly unique to you!
Express Your Creativity with Shill Art
We hope that the journey of recreating this classic mythological beast in our guide has been delightful. Our aim was to make drawing the griffin an enjoyable and frustration-free experience. Now it's your turn to shine and infuse your finished griffin drawing with your own details, ideas, and color choices. Let your creativity flow!
For more drawing guides and inspiration, visit Shill Art – Express Your Creativity. We are constantly updating our website with new guides for you to enjoy. And remember, we're always excited to see your artwork. Share your finished griffin drawing on our Facebook and Pinterest pages for everyone to admire!