
Welcome to Shill Art – Express Your Creativity! In this article, we will guide you through an easy-to-follow method for drawing hair. Whether you're an aspiring artist or just looking for a new hobby, this step-by-step approach will help you create beautiful hair drawings. So grab your pencils and let's get started!
Drawing Hair – The Four-Step Approach
Drawing hair may seem daunting, but we've broken it down into four distinct processes. Well, actually, it's more like a three-step approach, as the third and fourth steps are combined and executed simultaneously. But before we delve into drawing the hair, it's essential to establish the structure of the head. The head's structure determines the shape and flow of the hair and should be defined before beginning the hair-drawing process.
Step One – Define the Outer Contour of the Hair
Assuming you've already sketched the head's structure, the first step is to outline the hair's outer contour. This involves drawing the lines where the hair overlaps the forehead, portions of the face, and the shoulders. Each head of hair is unique, so the contours at this stage will vary for each subject.

Tip: The medium you use will influence how you approach drawing hair. For example, if you're using pastels, you may choose to fill in the hair's shape with solid color and skip drawing the contours. In this lesson, we'll use graphite pencils. So, we'll draw the contour lines lightly and loosely with a harder and lighter 2H pencil. Be cautious not to apply too much pressure, as it can indent the paper's surface.
Step Two – Draw Shapes For The “Clumps” of Hair
As you draw the contour lines to define the overall shape of the hair, it's essential to also draw smaller shapes for the hair clumps. Hair strands naturally collect and create a form, which we refer to as a “clump.”
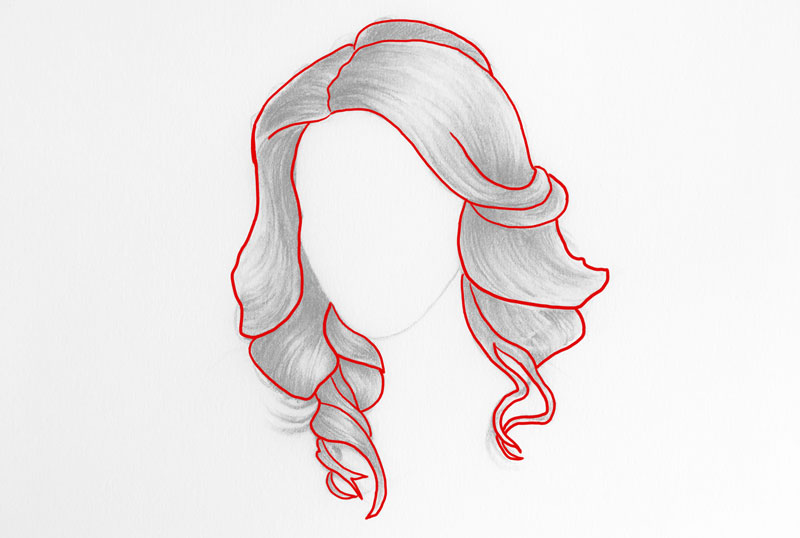
Drawing every strand of hair would be incredibly time-consuming and result in unnatural-looking hair. Instead, we need to focus on the hair as a form. In the next step, we'll define the volume of these forms, but for now, let's concentrate on defining the shapes.
Step Three – Developing the Volume Through Value
Forms are best understood by studying how light interacts with them, and light is understood through value. Therefore, in a drawing, we comprehend forms by using value, which refers to the darkness or lightness of a color. By observing the values and tones within the hair, we can communicate its volume effectively. Most hair has a full range of value, including the darkest darks, the lightest lights, and the middle values.
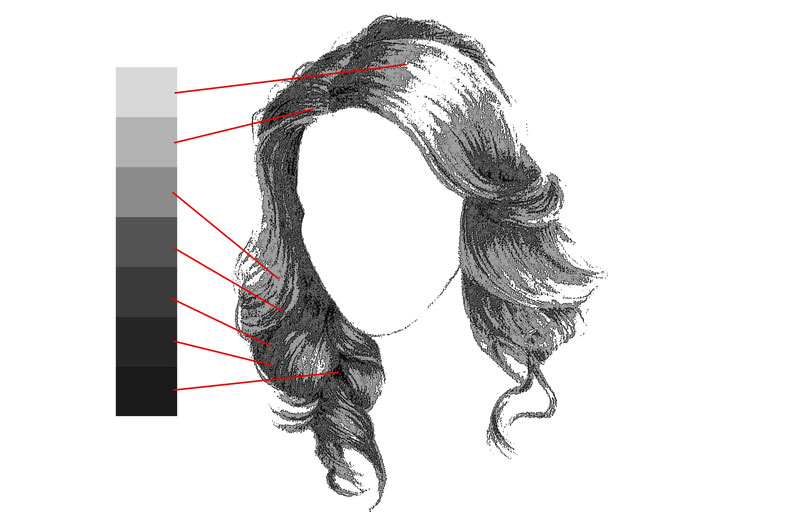
Keeping in mind the nature of light, we can make a few assumptions:
- Locations that recede will have darker values.
- Locations that protrude will have lighter values.
- Regardless of hair color, there will be light and dark values.
Typically, hair parts and areas around the face are darker in value since they recede. Highlights are often found on the top of the head, closest to a light source above. To convey the full range of value, we'll start by using a harder 2H pencil to develop the darkest value, mid-tones, and lightest value. As we progress, we'll switch to a darker and softer pencil to address areas with darker value and tone. Throughout this process, we'll also consider texture to create the illusion of form.
Now that you have a clear approach for drawing hair, it's time to grab your pencils and practice! Remember, drawing hair requires patience and practice, so don't be discouraged if it doesn't turn out perfect right away. Keep experimenting, exploring different techniques, and most importantly, have fun!
If you'd like to discover more artistic tips, tutorials, and inspiration, check out Shill Art – Express Your Creativity. Click here to visit our website: Shill Art – Express Your Creativity
Follow us on:
- Facebook fanpage:https://www.facebook.com/ShillArt.Official
- Facebook group:https://www.facebook.com/groups/FreeColoringPagesToPrint
- Pinterest:https://www.pinterest.com/ShillArtOfficial
More Coloring Books at here, see now:https://shillart.com/coloring-books