
Making paper cup flowers is not only a fun and easy craft for kids and adults, but it's also a fantastic way to repurpose those old paper cups lying around your house. These delightful creations can be used as decorations or given as thoughtful handmade gifts. In this step-by-step tutorial, we'll guide you through the process of crafting your very own paper cup flowers. Let's get started!
Materials Required:
- Paper cups
- Scissors
- Pencil
- Watercolor or other coloring materials
- Hot glue
- Rectangular sheet

First, take two paper cups and make a small cut on the edge of one cup, then cut the rim off. Next, make another cut going towards the base of the cup, leaving some space at the bottom. Repeat this step five more times to create a total of six cuts, ensuring equal spacing between each flap. If you prefer, you can use a pencil to measure and mark the distance between each flap for accuracy.
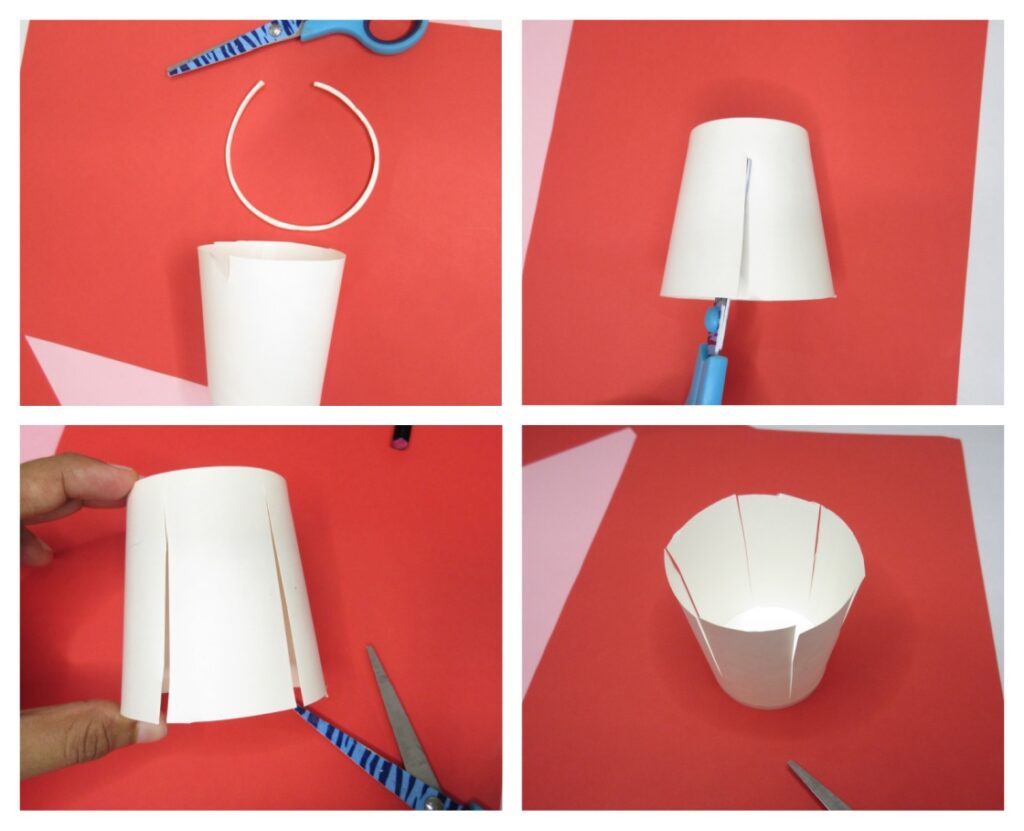
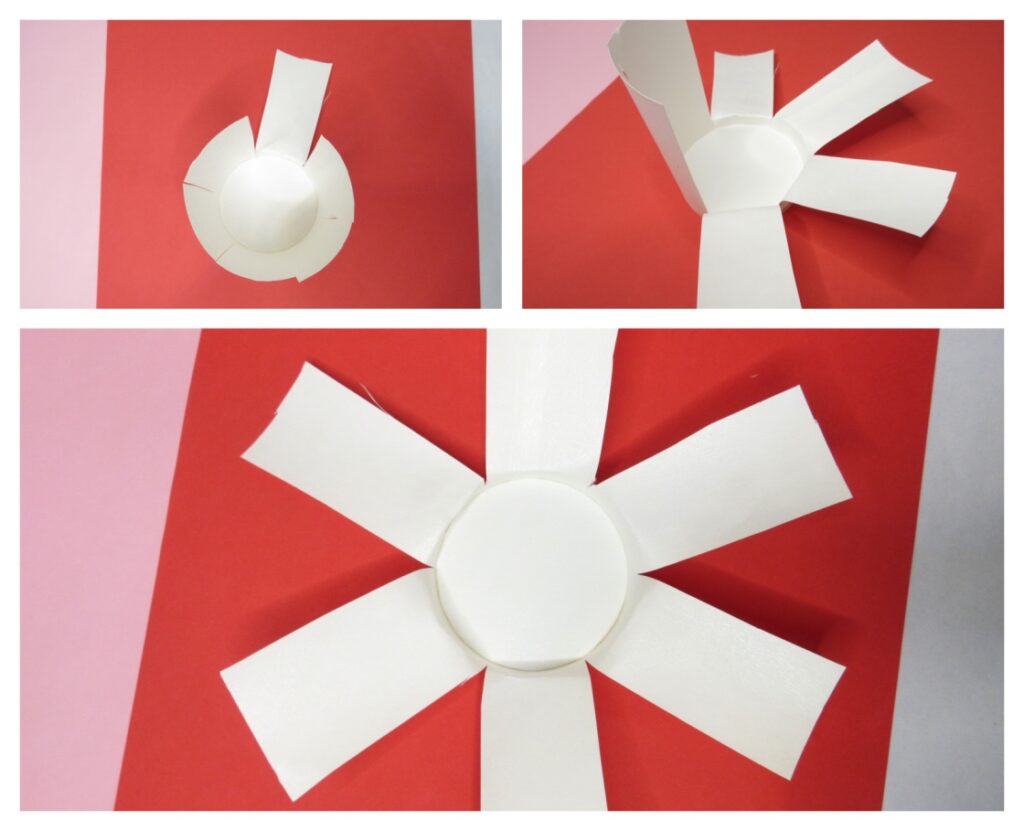
Now, open each flap one by one, as shown in the collage above. Draw a pointed edge on each flap and cut along the outline. Repeat these steps with the second paper cup, but make the petals slightly shorter than the first cup's petals.
It's time to add color! Use your preferred coloring materials, such as watercolors, to give your petals a vibrant look. Keep in mind that some coloring materials may not adhere well to the waxy surface of paper cups, so choose accordingly. You can also choose to color the center portion of the flower or leave it blank.
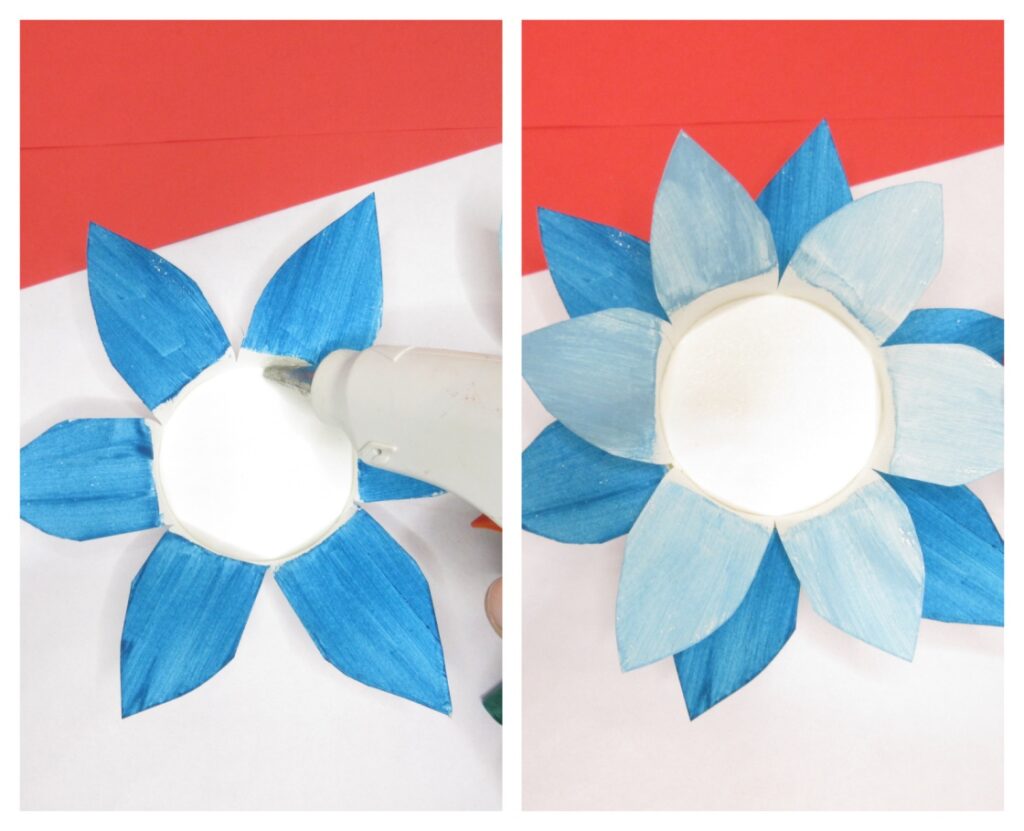
Apply some hot glue to the center of one flower and attach the second flower with shorter petals on top. This step will create a visually appealing layered effect.
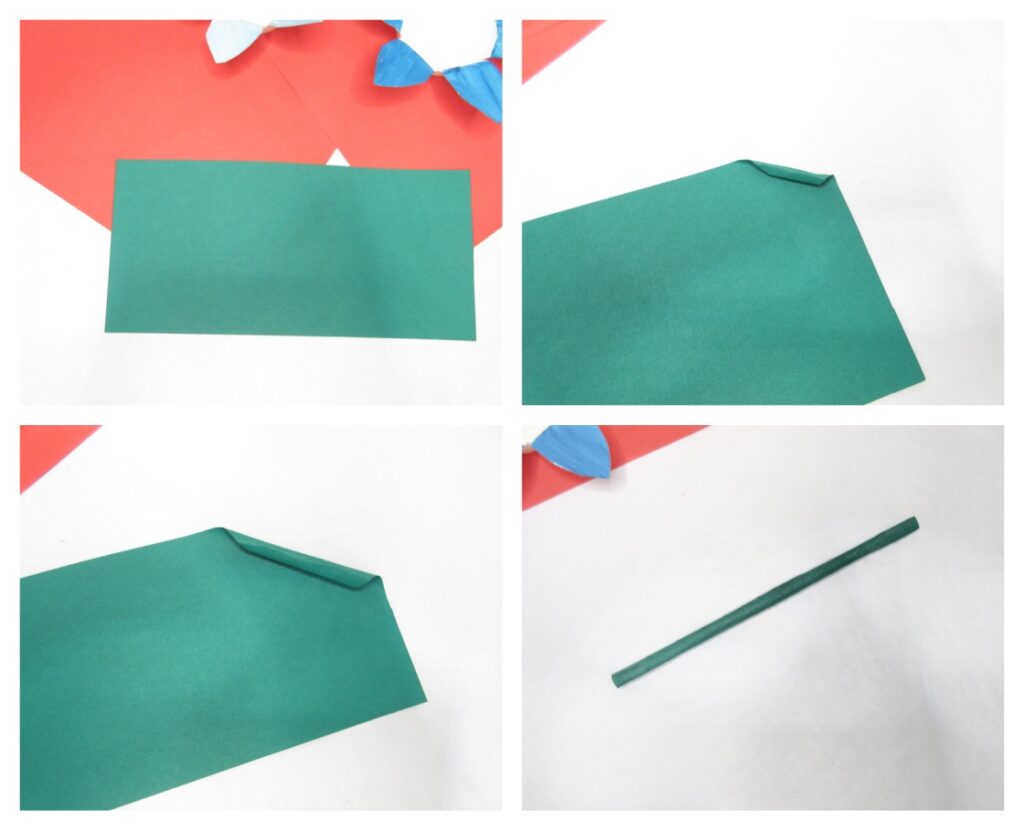
Now, let's make a stem for our paper cup flower. Take a rectangular sheet and roll it diagonally from one end as thinly as possible. Apply glue to secure the end of the rolled sheet. Apply hot glue to the back of the paper cup flowers and attach the paper stem to them.
And voila! Your beautiful paper cup flower is now complete and ready to be displayed or gifted.
More Flower Craft Ideas for Kids:
- How to make a paper rose step-by-step
- How to make a paper sunflower step-by-step
- How to make a beautiful paper flower
- Paper plate flower garden wreath idea
- Simple paper, pipe cleaner, and pom-pom flower craft
Don't forget to check out our Shill Art – Express Your Creativity website for more creative craft ideas, tutorials, and coloring books. Happy crafting!
Note: The images used in this article are sourced from the original article on The Purple Yarn website.
Follow us on:
- Facebook fanpage:https://www.facebook.com/ShillArt.Official
- Facebook group:https://www.facebook.com/groups/FreeColoringPagesToPrint
- Pinterest:https://www.pinterest.com/ShillArtOfficial
More Coloring Books at here, see now:https://shillart.com/coloring-books